Deb's Daily Bread
  • Blog
  • About
  • Contact

Recipes from my kitchen

English Muffins from Sourdough Discard

4/19/2020

0 Comments


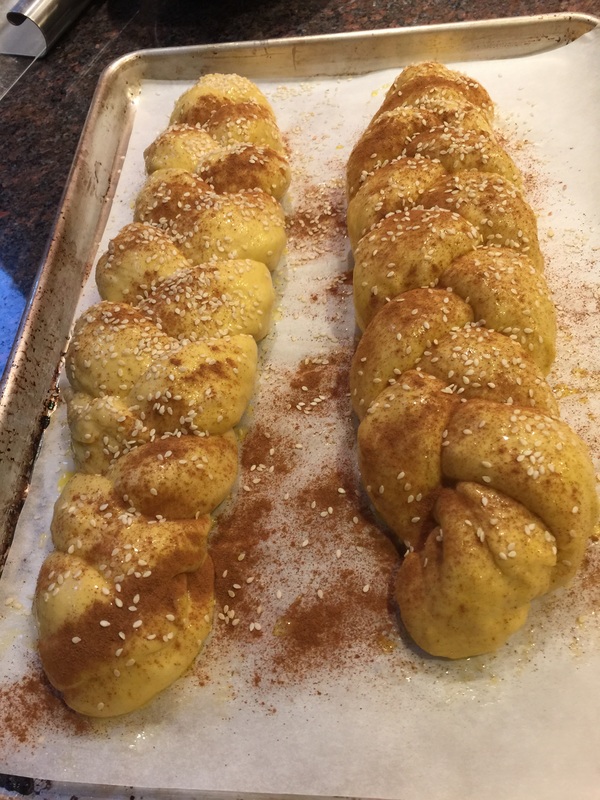
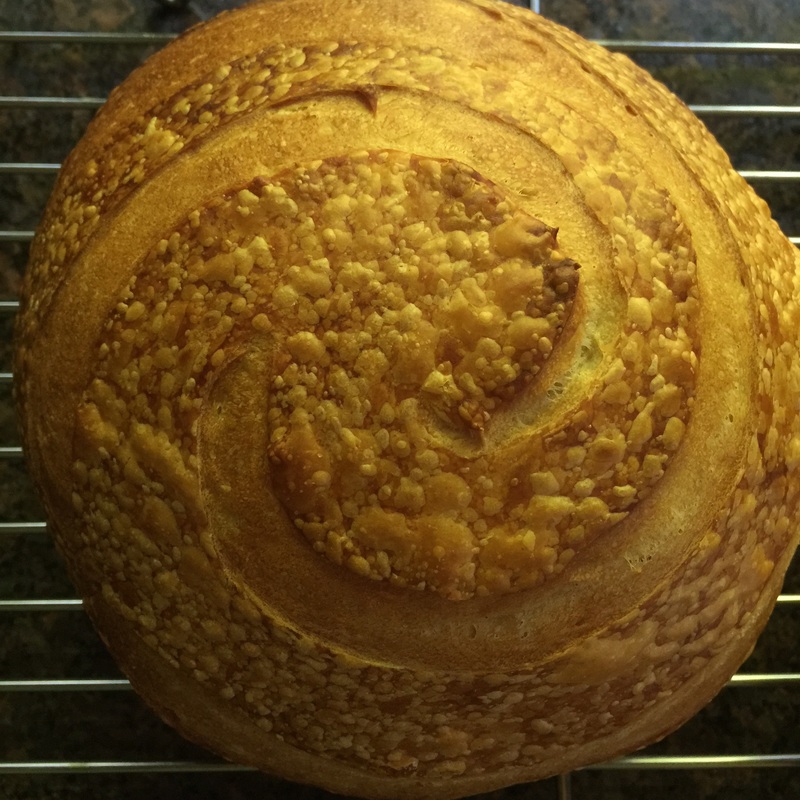
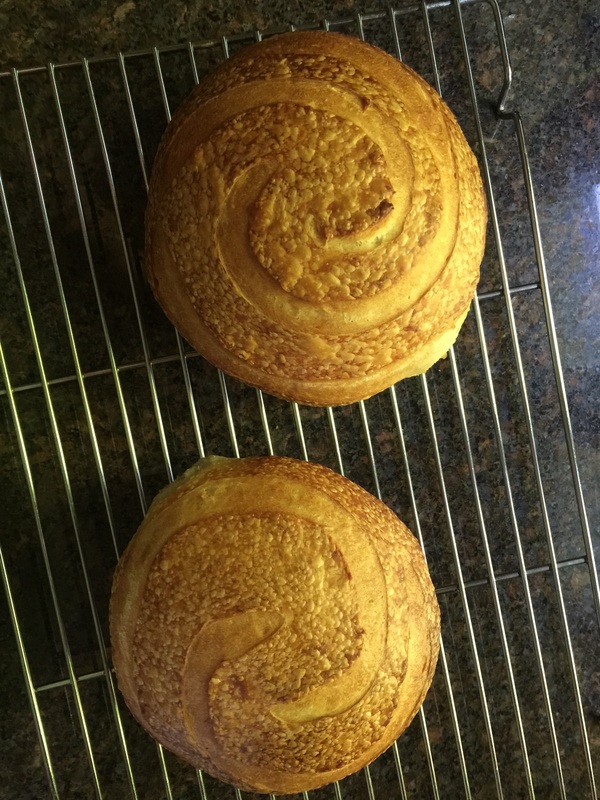
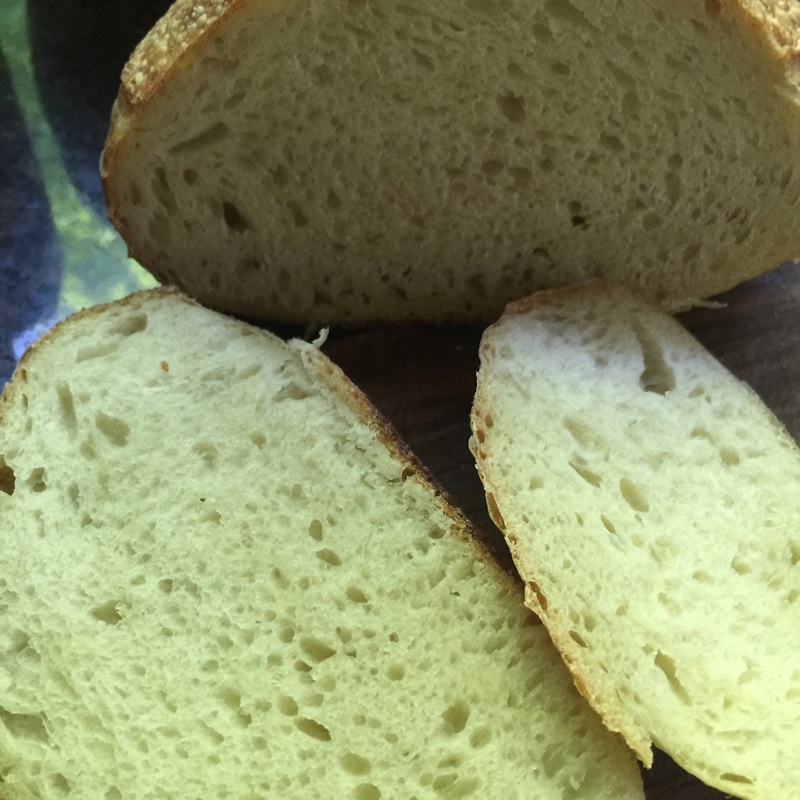
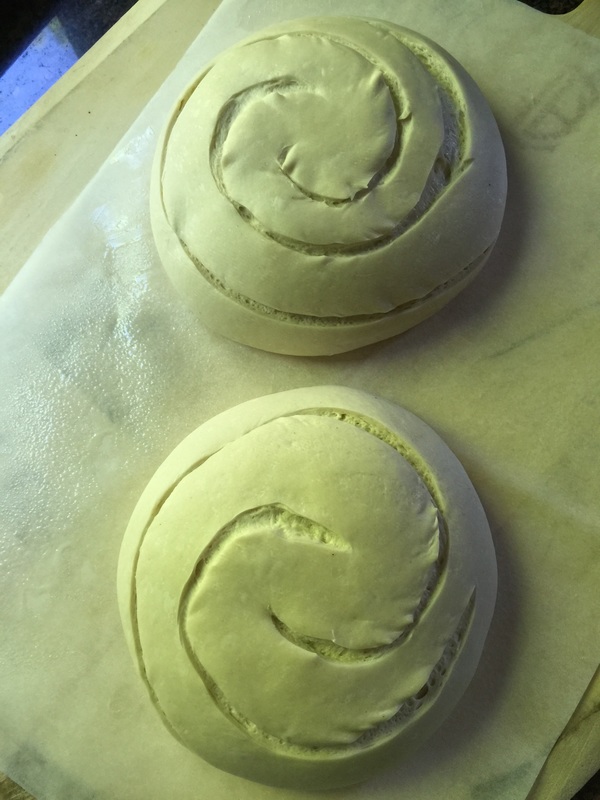
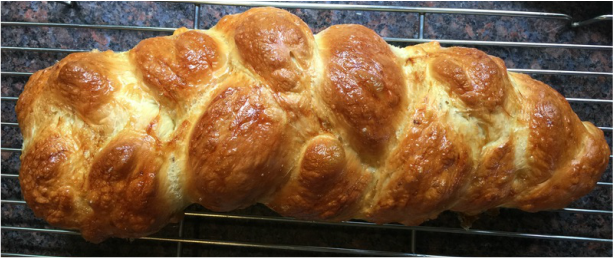
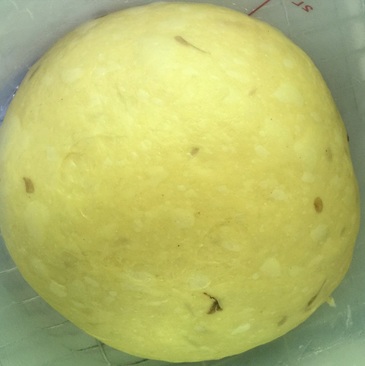
Because we are still in quarantine and flour is scarce, I am only feeding my starter enough to bake the loaves I want, then putting it in the fridge until I am ready to bake again.  However, it needs a few feeds before it’s ready for bread each time.  Yesterday, I took out my starter and fed it 1:1:1 with whey and bread flour, and then fed it again about 12 hours later with 1:2 whey/bread flour.  It was so happy by morning that it looked like beautiful bubbly dough.  I gave it another feed this morning but wanted to create something fabulous with the discard. 
 
I went back to an old tried and true recipe from King Arthur Flour, but I had to modify it to accommodate for my lack of ingredients while in quarantine.  I think the result is actually much better than when I used the KAF formula exactly.  KAF’s recipe called for 227g of starter discard, but I only had 160g of fed active starter.  So instead, I took out another 20g of unfed starter and gave it 20g of buttermilk and 27g of AP flour.  I combined this freshly fed starter with my previously fed starter discard to get to 227g of active and fed starter.  The buttermilk also helped resolve the missing citric salt and dried milk ingredients.  I used the last of my whey (1/4 cup) and mixed it with 1 1/3 cups of warm (90F) water.
 
Ingredients:
2 Tbsp sugar 1 1/3 cup warm water ¼ cup whey 1Tbsp active dry yeast 160g sourdough starter discard (ripe) 180g freshly fed discard 20g unfed starter 20g buttermilk (real cultured milk) 20g AP flour 843g AP flour 57g (1/4 cup) butter cut into cubes 1 Tbsp bread salt Cornmeal for coating  
 
1)First, feed the smaller starter with the buttermilk and flour, and combine with the remaining normally fed starter for a total of 227g of starter. Then combine everything except the liquid and the salt in a mixer on low speed.  Slowly add in the liquid until combined.   Let it rest 5 minutes and then add the salt.  Mix for 5 minutes (use a timer).
 
2)You should have a fairly firm dough (the mixing bowl should be relatively clean).  Turn the dough out and knead into a ball.  Place it into an oiled bowl (large enough for it to expand) and cover.  This first ferment takes between an hour and a half to two hours. However, you can also put it in the fridge and let it ferment for 24 hours and resume baking the following day.
 
3)Turn out your dough onto a lightly floured work surface.  (In a flour shortage,  I used Peter Reinhardt’s technique of lightly oiling my work surface and my hands with olive oil). Give it a gentle knead and then cover it with a damp tea towel for about 5 minutes (this step is important because otherwise the dough will be too elastic to roll properly). Divide the dough in half.  Roll the first piece ½” thick and cut 4” rounds (the ones shown in the picture were cut with 3” rounds and they were very small).  Then repeat with the second half. You can re-roll the scraps too. 
 
4)Place the shaped muffins onto a baking sheet dusted with cornmeal (approx. 12 per sheet). Sprinkle additional cornmeal over the tops. Cover with either loose plastic wrap or lightly dampened tea towels and allow them to rise for about 40-60 minutes.
 
5)I like to cook English muffins in a cast iron pan.  I heat the cast iron to about 350F and cook them on each side until the centers read 190F.  I find that after the initial heating in the cast iron, I have to turn the flame down to low, so they don’t burn on the bottoms before cooking through. 
 
6)Remove and cool them on a rack.  Then eat and enjoy!
 
 
Here are the differences that I noticed between the original recipe and my modifications:
The buttermilk and whey gave it an incredible flavor.  The cold butter cubes helped make them flaky. 

0 Comments

Homemade Heritage Wheat Baguettes

6/14/2015

0 Comments

 
Picture
Homemade Heritage Wheat Baguettes
After taking the baguette class at King Arthur Flour a few weeks ago, I decided to brave the challenge and make them at home.  Baguettes are a simple, lean dough made from flour, water, salt and yeast. However, to get really beautiful, tasty baguettes, the devil is in the technique.  

I liked the King Arthur Flour formula that we made in class, but Jeffrey Hamelman offers a much more detailed version of this formula in his Bread book.  I cleaned my granite countertop throughly and started playing with bread dough.  

What I like about this formula is that once you complete your fermentation (and I did try to fold by hand and not by mixer despite the wetness of the dough) at room temperature, you can divide the dough into weighed pieces and stick them in the fridge until you are ready to shape, proof and bake them (up to 18 hours).  So I made the dough the day before, weighed out 4 loaves and stuck them into the fridge.  

My poor fridge looked like a science experiment between the containers with bread dough, starter, homemade coconut milk kefir, and homemade evaporated milk (other projects/other blogs).  But early the next morning, I woke up and started shaping loaves.  

What I very quickly learned about shaping 1lb baguette loaves to be baked in a home oven is that you can't shape them exactly the same way you would a baguette for a commercial oven.  You would have to 1/2 the weight to get them so thin.  Well, that meant I could handle them less in the shaping process, which made it easier to get a consistent shape. I had only one messy loaf, and that was a result of transfer, not shaping.  

So next time I have two options - make 8 1/2 lb loaves - or keep making 4 thicker 1lb loaves.  

Truth is, I kind of liked them a little thicker and felt that you could do more with them, but I may experiment and see either way.

I baked all four loaves at the same time in a 525F degree oven.  I baked the first two on a baking tray on top of a steel in the middle rack and the second two on a pre-heated tray on the top rack.  That worked out because all four loaves baked evenly.  

The other major difference in these loaves and what we did in the KAF class is the flour.  For these, I used a stone milled heritage wheat called Bolted Red Fife from Sunrise Flour Mill.  This wheat is something special.  It's an heirloom wheat variety that is not mass produced.  This kind of heritage flour is know to be easily digestible and friendly to people with gluten sensitivities.  


This is what they say about it on their website, " Modern wheat is very different from the wheat our ancestors ate. The developments in grain have made it difficult for some people to digest, but that doesn't necessarily mean they need to change to a gluten-free diet. If you've experienced negative health effects as the result of gluten intolerance, but miss your morning toast or favorite dessert, Sunrise Flour Mill's Heritage Flour products may be the answer. These superior flours aren't just for those who experience problems with gluten. Many people use Heritage Wheat because it truly tastes like wheat and results in delicious pastries, breads, pasta and pizza."


I bought this wheat because it was more nutrient dense and healthier.  I also bought it because it was stone milled and organic.  Let me tell you - I will keep buying it for the taste!  It tastes fantastic!  When I cut into my sample loaf (the one that didn't shape properly), and tried it - I couldn't stop at one taste.  I had three pieces right away because it was THAT good!  It's not the same sparkling white as many of the other commercially available flours.  In fact, it has a reddish brown color to it when baked that is easily mistakable for whole wheat - but  don't let the color fool you, this is a light, airy flour that makes a fantastic baguette! 


0 Comments

Vermont Whole Wheat Sourdough

6/13/2015

0 Comments

 
Picture
Jeffrey Hamelman's Vermont Sourdough bread recipe.
I bake two sourdough loaves every week at home.  Normally, I use the Peter Reinhardt recipe found in A Bread Baker's Apprentice.  This time, I wanted to try something new.  I made the Vermont Sourdough with whole wheat recipe found in the Jeffrey Hamelman Bread book.  

I used my fed starter with a combination of King Arthur Four Bread flour and Farmer Ground Whole Wheat Bread Flour. Farmer Ground is a New York State wheat grower and mill.  This particular flour is based on a red colored heirloom wheat. 

As they say on their website, " Also sometimes called “half-white” flour.  This flour averages between 12.5 and 13.5% protein.  It contains all the original germ and a small portion of the original bran.  Slightly darker in color than conventional white flours, but much closer in performance to a white flour than a whole wheat.  This sort of high-extraction flour is what in Europe would be called “T-85,” the same sort of flour used by the Poilan Bakery to make their world-famous Miche."

I used this flour a few weeks ago to bake a Miche style bread (Miche is a very large 100% whole wheat bread produced and sold in French bakeries, like Poilan) and the results were incredible.  It gave me a nutrient dense loaf that you would expect to be heavy, but it wasn't heavy.  It was light, tender and delicious.  What's more, the bread stayed fresh for almost a full week.  Each day it changed in character and flavor, giving me a totally new experience. 

So, I was excited to use it in combination with my tried and true standard bread flour from King Arthur Flour.  Both of them are high protein flours, giving the loaves between 12 and 14% of protein each, which resulted in fabulous gluten development. 

Now, most people allow this bread to proof overnight, and the next time I make it, I will do that.  However, I started too late in the day and didn't have time to give it an overnight rest, so I was up at 1am folding my dough and 4am shaping loaves for a 6AM bake.  

Because it's been hot, even overnight, the room temperature has been holding at about 75-77 degrees, so it was equivalent to keeping the bread dough in a proof box through the entire process.  

I firmly believe that adding cold proof to any sourdough baking process will result in a pretty spectacular loaf.  However, these loaves still gave me fantastic and complex flavor without the cold ferment.  I had a pronounced sour flavor that sweetened on the palate.  I loved the crumb structure and large air holes.  My only issue was with the crust - and this was my fault.  I knew that 420F degrees would be too low in my home oven to produce a beautiful crust.  The book said bake at 420F and it was my first time using this formula, so I did.  Next time, I am going back to working with higher oven temps - like 525F - for my sourdough baking.  

All in all, I am a fan of this well tested and reliably delicious formula.  I'll continue to keep in my weekly bake rotation.


0 Comments

Pan de Calabaza, Spiced Pumpkin Challah

6/12/2015

0 Comments

 
Picture
Pan de Calabaza
I have a few friends on Instagram that bake weekly from this fantastic book called A Blessing of Bread by Maggie Glezer.  The book chronicles the recipes of many old-world Jewish bakers, capturing their traditional recipes, handed down for generations, and preserves them.  

I watched these two incredible bakers @thelavenderbakery and @lisamcohen produce one stunning loaf after another from this book and I knew I needed to join them.  

My first bake is the Pan de Calabaza, which is a Sephardic pumpkin Challah bread made with pumpkin, cinnamon and cardamom.  

I bulk fermented the dough in the fridge for 24 hours before shaping the loaves.  Then I allowed them to proof on my counter for a couple of hours, brushed them with an egg wash, sesame seeds and a touch of cinnamon, and baked them.

MY HOUSE SMELLED AMAZING as I baked this bread.  I wish I could capture that smell and share it with you.   I plan to cut into these loaves and taste them tomorrow, when a friend comes over for lunch. 

I believe the recipe for this bread has been published online through Fresh Direct, if you want to try making it. 
0 Comments

French Baguette Class at King Arthur Flour

6/2/2015

0 Comments

 
Picture
French Baguettes with straight scoring, one sided epi and traditional epi.
This weekend my boyfriend and I traveled up to Vermont, where I took some classes at King Arthur Flour.   We worked from their French Baguette recipe. 

They made and measured out the poolish for us in advance.  Then had us mix the dough by hand.  Now, I confess that I mix almost all of my bread dough in a Kitchen Aid Mixer- and almost never mix by hand.  I do a lot of my kneading in the mixer as well – so this forced me to think and work differently (always a good thing). 

The recipe made very wet dough, which we then kneaded by hand using a rapid slap-and-fold method that she demonstrates in the video below.  

King Arthur Flour Baking Education Center Folding Wet Dough from Deborah Szajngarten on Vimeo.

After kneading until partial gluten development, we left the dough to rise while we worked with pre-made dough on shaping and scoring.  Their method was slightly different from Peter Reinhardt’s method in his craftsy class, and it took some getting used to before I felt comfortable with it.  You can see it in the video below.  

Dough shaping techniques from King Arthur Flour Baking Education Center from Deborah Szajngarten on Vimeo.


Finally we worked on scoring.  Much like shaping, scoring is one of those techniques that just takes a lot of practice.  I felt a lot more comfortable with the scoring than I did with the shaping.   In the end, we turned out some beautiful loaves.
Picture
Shaped loaves
0 Comments

Pumpkin Brioche

5/31/2015

0 Comments

 
Picture
This bread is so good, in my house, it almost never makes it past the cooling period.  It's eaten so quickly. If you don't have a star shaped Brioche pan, you can bake it in a regular loaf pan.

Sponge
  • 1 cup bread flour
  • 1/3 cup water
  • 1/8 teaspoon instant yeast

Dough
  • 2 ¾ bread flour
  • 1 1/3 tablespoons milk or coconut or almond milk
  • 2 eggs
  • 1 yolk
  • 1 ½ teaspoons instant yeast
  • 1 ½ teaspoons salt
  • 1 ¼ cups pumpkin puree
  •  1/3 tsp cinnamon (scant ½ tsp)
  • ¼ tsp nutmeg
  • ¼ tsp ginger
  • ¼ tsp cloves
  • ¼ cup sugar
  • 2 Tbsp honey
  • 2/3 cup butter or earth balance buttery sticks
  • sponge 

combine eggs, milk, honey, sugar, at low speed 5 min.  Add flour, spices, and sponge, mix for 5 minutes-low speed.  Add butter, pumpkin puree ,and salt, mix 4 min fast.

Let rise at 75 degree for 45 minutes.

Fold and allow to rest another 45 min

Divide and shape into rounds – let rest 15 – 20 min, covered.

Shape or add to molds and proof for 1 ½ hours on parchment lined sheet pans

Egg wash & top with pearl sugar

Bake at 350F for 15 min 20 min, or until golden brown on top and bottom (internal temp) 190 F.

Picture
0 Comments

Homemade Everything Bagels

5/23/2015

0 Comments

 
Picture
Homemade Everything Bagel with Plain Omelet and Grilled Garlic Salami
There has been a lot of internet chatter these days about New York style bagels and how to recreate them at home since Cook’s Illustrated posted their test results and evaluation.

Well, in order to compare a formula to a New York bagel, you have to have eaten enough of them to know what the ‘real deal’ actually is.  If the comparison is to a major chain like H&H then you are not really achieving greatness.  

I grew up in a neighborhood next to Coney Island in Brooklyn.  The area was a mix of Irish, first and second generation Sicilian, second and third generation Jewish immigrants.  If there were two things we knew well, it was pizza and bagels!

The best bagels came from a bagel bakery at the end of Cropsey Avenue called, unsurprisingly, Cropsey Bagels.  Unfortunately, they are no longer in business, which is a huge loss to bagel fans everywhere.

They made the perfect bagel.  First, these bagels had height!  They sat at least five inches from the table.  They had a beautiful, shiny, golden glow.   The crumb was light, soft and tender, and the taste!  They had a complex flavor profile that reminded me of a mild yet malty sourdough.

The only other bagel I have had that came close to this bagely perfection came from Bagel Train, in Suffern, New York— Thankfully, they are open and doing quite well.

There are many places to buy bagels around my home.  None of them come close the magic of Cropsey Bagels.  I knew, if I wanted it, I had to try to recreate them at home.  I tried a number of recipes, but, so far, the one I like the best comes from The Culinary Institute of America’s Artisan Breads At Home book by Eric Kastel. 

However, I made a few small modifications.  First, I make the malt-boil, I add more malt syrup than the recipe calls for (by 2 Tablespoons).  Next, I put the bagels into an ice bath when they come out of the boiling water, then I will roll them in my toppings (my "everything" topping comes from King Arthur Flour) I ALWAYS proof overnight.  The longer they rest, the more the flavor profile will develop.  So if I want them on Sunday morning, I start Saturday morning and let them proof for like 15 hours in the fridge.  I’ll take them out about one hour before baking, and
 I bake them directly on top of a hot steel in a 500-degree oven.

Rolling them is a bit tricky, but after a few tries, you get the hang of it.

0 Comments

Sourdough Bread with Double Swirl Scoring

5/22/2015

1 Comment

 
Picture
Sourdough Boule with Double Spiral Scoring
Every week, I bake a batch of sourdough bread to eat during the week. Lately, I've been using Peter Reinhardt's Bread Baker's Apprentice recipe, which is a 3-day formula.  I love this recipe because it gives me a deliciously flaky crust with a soft but structured crumb and a complex "sour" flavor.  

For this morning's loaf, I decided to have fun with the scoring.  I channeled my inner Tim Burton and decided to play with double spiral patterns.  

I'm really pleased with the results.  It even gave me a hint of an ear on the loaf.
1 Comment

Quest For The Perfectly Poached Egg

5/18/2015

0 Comments

 
Picture
Poached eggs on homemade sourdough bread with garlic salami
Perfectly Poached Eggs


For perfect poached eggs, the most important step is to use fresh eggs.  There are many tricks, gadgets and assorted cheats that people use when poaching eggs, like:

·      Putting them into plastic wrap before placing them into the water, so they retain their shape.

·      Using a poaching pan (which is really more like a double boiler)

·      Nuking them in a water bath in the microwave

·      Straining the raw egg first before putting them into the water

Wonder How does a fantastic job of summarizing all of these different egg poaching methods in their poached egg blog.

Each method has its merits, but I’m a fan of the old fashioned, traditional method that Alton Brown demonstrates to us here:


Don’t have time for the video?  His recipe (which I use every time) can be found here.
0 Comments

Lilac Challah Bread

5/16/2015

0 Comments

 
Picture
Lilac Braided Challah

It's such a beautiful spring!  The season has been especially kind to the lilacs, which are bursting out everywhere.  Last week, I made lilac sugar.  While I watched the bouquet of lilac blossoms on my table begin to wilt, I decided to use them to make a lilac Challah bread.  

I used the lilac sugar in the recipe, but I also stripped off the petals of one of my blossoms and added it to the dough in the mixing stage.  For the recipe, I used Peter Reinhardt's The Bread Baker's Apprentice Challah recipe.  But instead of the SAF Red Instant yeast that I'll use for lean doughs, I used the Gold SAF Instant Yeast instead. And, for added richness, I replaced two of the eggs in this recipe with duck eggs.  
Picture
Lilac Challah Dough


Now, It's been a while since, I've braided anything, so I had to practice getting used to the tension in the bread dough, but we got there.  I was so pleased with the beautiful the strands of petals weaving through the dough. 
Picture
Lilac Challah Braids
They proofed beautifully and then baked at 325 convection for about 45 minutes until they reached an internal temp of 200 degrees.  

Picture
Lilac Challah Bread
And finally, served with a little local raw honey...
Picture
Sliced Lilac Challah Bread with Drizzled Honey
0 Comments
<<Previous

    Deb 

    I'm a home cook with a lifelong passion for learning, exploring and experimenting in my kitchen. You can find me at @Debs1 on Twitter and  @Debs121212 on Instagram.

    Categories

    All
    Bagel
    Beef
    Beer
    Bread
    Brisket
    Brownies
    Buns
    Cabbage
    Cake
    Calamari
    Challah
    Cherries
    Chicken
    Chocolate
    Cookies
    Corn
    Cupcakes
    Deep Fried
    Desserts
    Donuts
    Drinks
    Eggs
    Empanadas
    Frittata
    Fritters
    Fruit
    Garlic
    Grilled
    Ice Cream
    Ingredients
    Jam
    Lamb
    Lilac
    Meringue
    Noodles
    Pasta
    Pesto
    Pie
    Pizza
    Potatoes
    Preserves
    Salad
    Seafood
    Sliders
    Soup
    Sourdough
    Spread
    Steak
    Stew
    Sugar
    Thai
    Vegetables
    Waffles

    Archives

    April 2020
    March 2020
    December 2015
    July 2015
    June 2015
    May 2015
    April 2015
    March 2015
    September 2013
    July 2013

    RSS Feed

    This website uses marketing and tracking technologies. Opting out of this will opt you out of all cookies, except for those needed to run the website. Note that some products may not work as well without tracking cookies.

    Opt Out of Cookies
Powered by Create your own unique website with customizable templates.
  • Blog
  • About
  • Contact