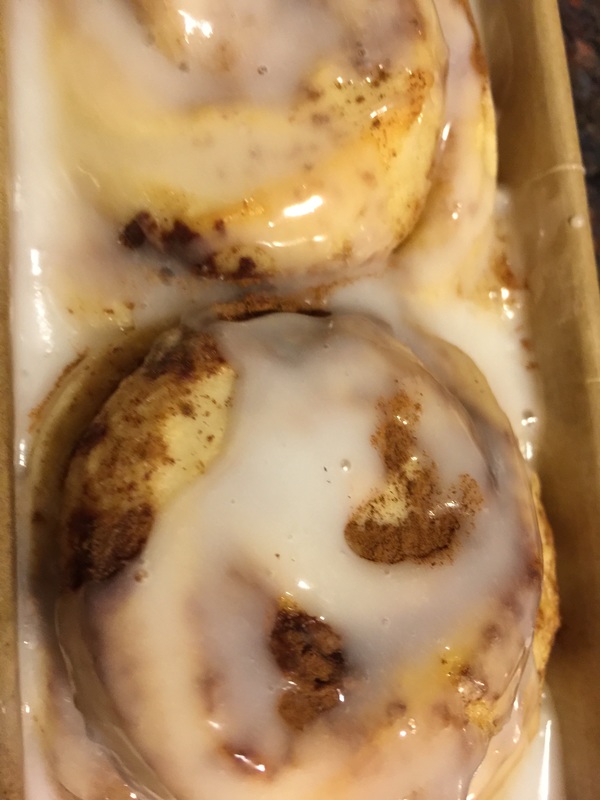
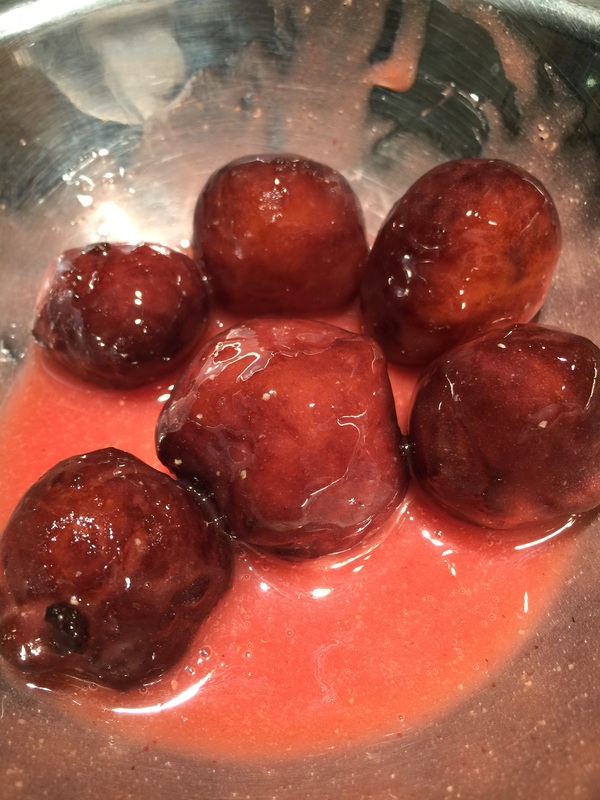
 Maple Cream Cinnamon Buns Maple cream cinnamon buns are a delicious way of using up extra sourdough starter. I've based this recipe off King Arthur Flour's Buttery Sourdough Buns. I use the same base, but my method diverges when it's time to fill and finish it.
Dough
Combine all of the ingredients in a mixer and mix until the dough forms a ball. Then take the dough out of the bowl and stretch and fold it a few times before adding it to a well greased bowl. Let it rise for about an hour to hour and a half -- until it doubles in size. Alternately - you can put the dough in the fridge for about 12-15 hours, then let it warm up for an hour before rolling. Now it's time to roll out the dough. You want to roll it into a wide rectangle approximately 12 x 16 inches and about 1/4 inch thick. The shorter side should be closest to you. Filling 1/2 cup Real Maple Cream 2 tablespoons ground cinnamon Let your maple cream warm up a bit, so it's easier to spread. Once you have your dough rolled out, carefully spread the maple cream in an even layer, leaving a 1/4 inch border around all sides. Liberally sprinkle the cinnamon on top of the cream. Then roll the cinnamon buns into a log. Cut the buns approximately 2 inches thick and place swirl-side up in your pan. I like to bake these in mini loaf pans, so each person can get two buns (much easier for portion control), but you can also add them all to a 9 inch baking pan - either round or square. Leave about an inch or so between each bun as you layer them into the pan because they are going to rise and spread. Sprinkle a little more cinnamon on top and loosely cover with a towel for about a 1/2 hour until they finish rising. In the meantime, preheat your oven to 375F degrees. When the buns are ready, bake them for 15-20 minutes (they won't brown much). Glaze 2 cups powdered sugar 2-3 tablespoons milk (I use coconut milk) or lemon Juice Whisk the milk or juice into the sugar vigorously until well combined. Start with one tablespoon of liquid and add more as needed until it forms thick ribbons. Then gently drizzle the glaze over the cooled buns. (If you put the glaze on while it's warm, it will melt). Then you can dive in!
0 Comments
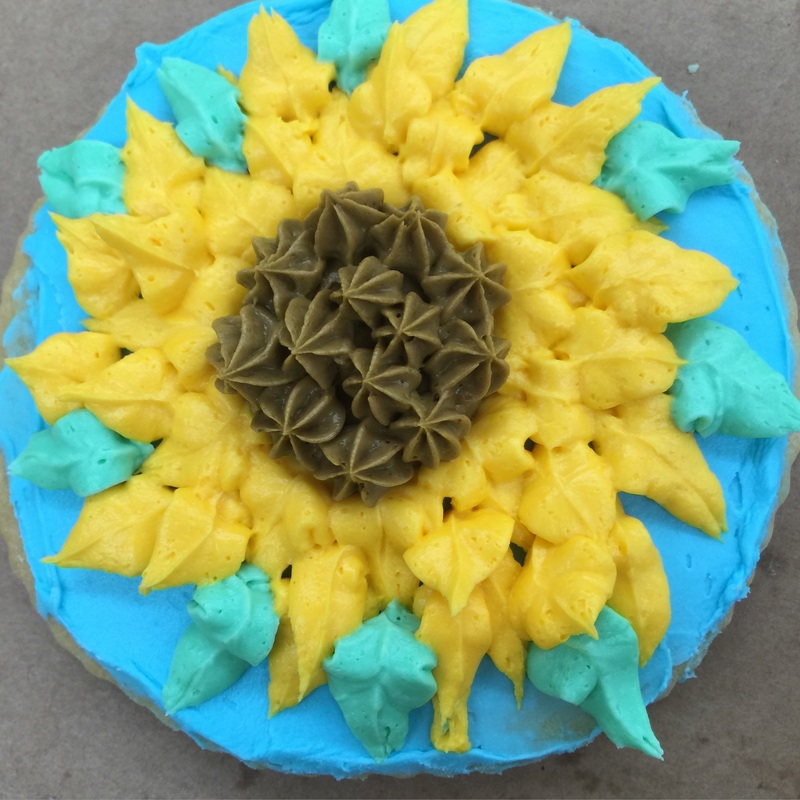
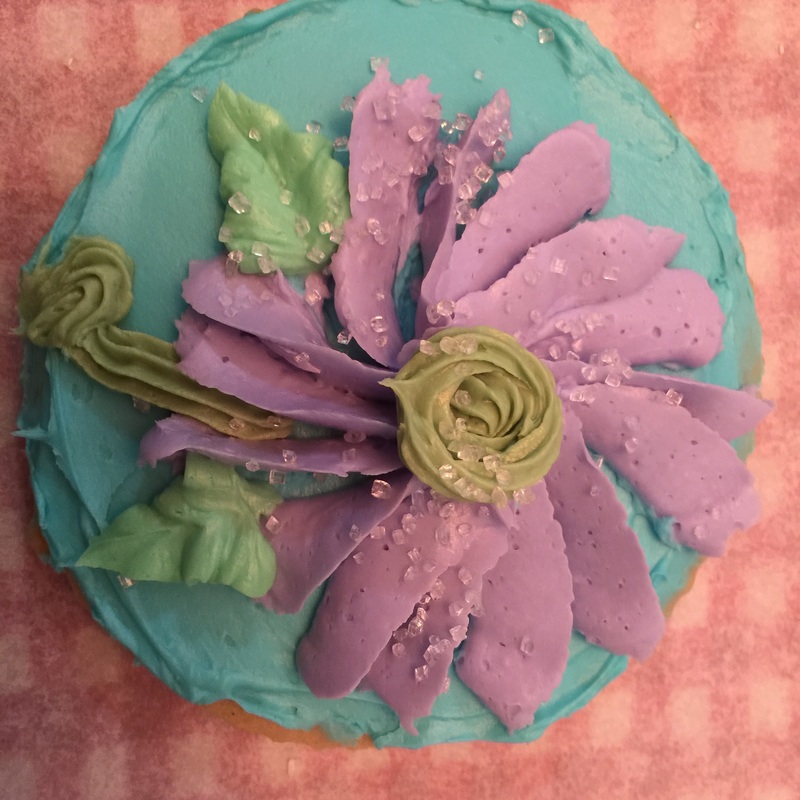
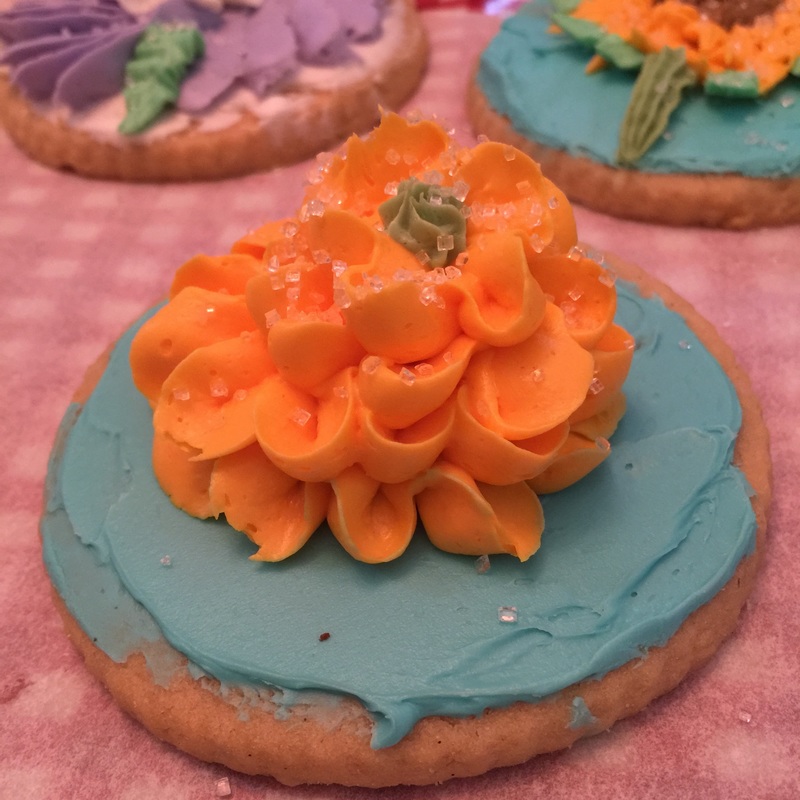
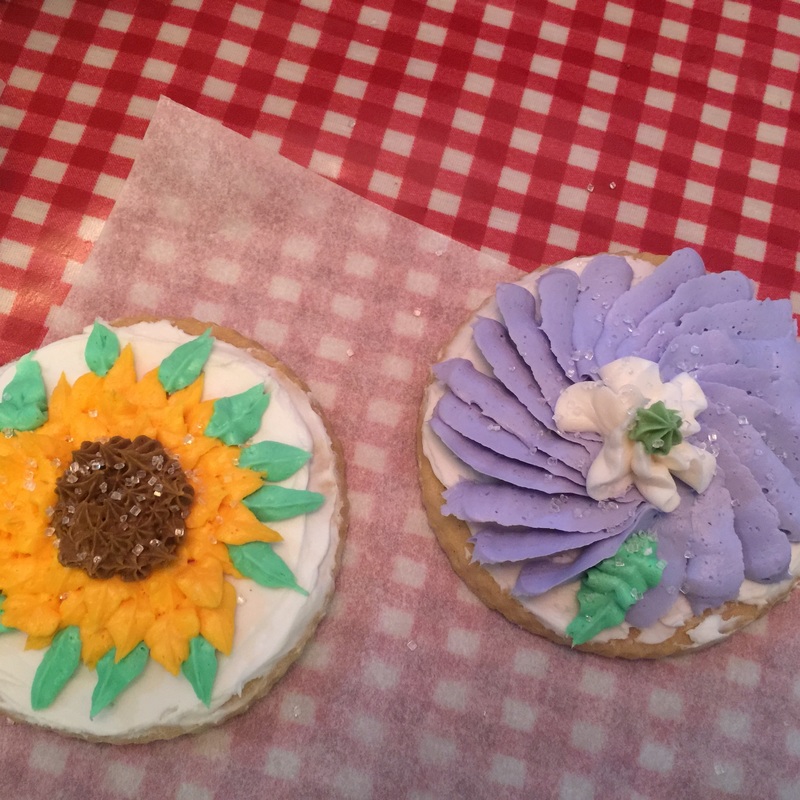
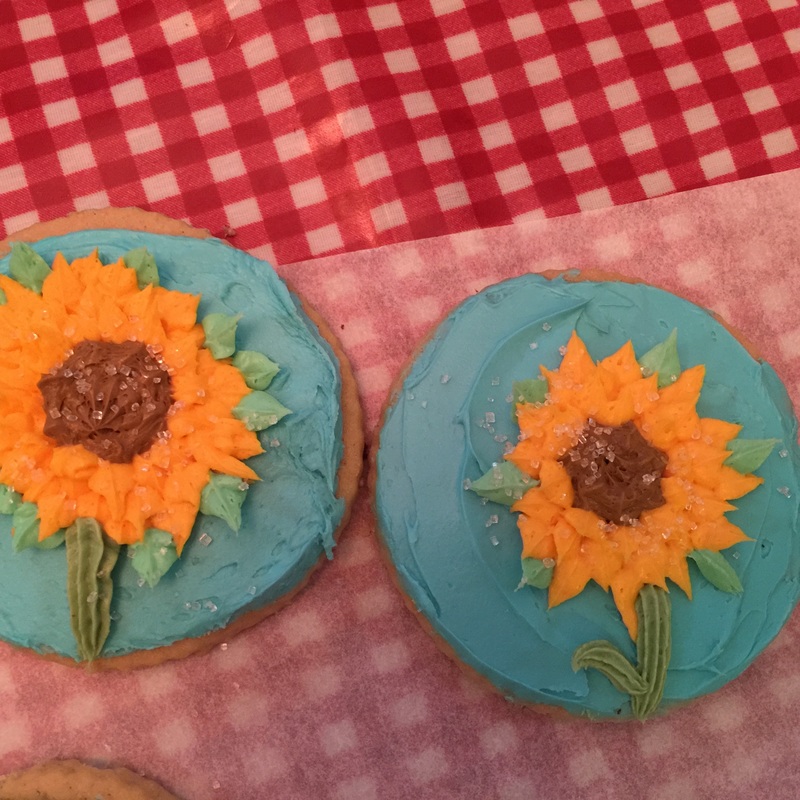
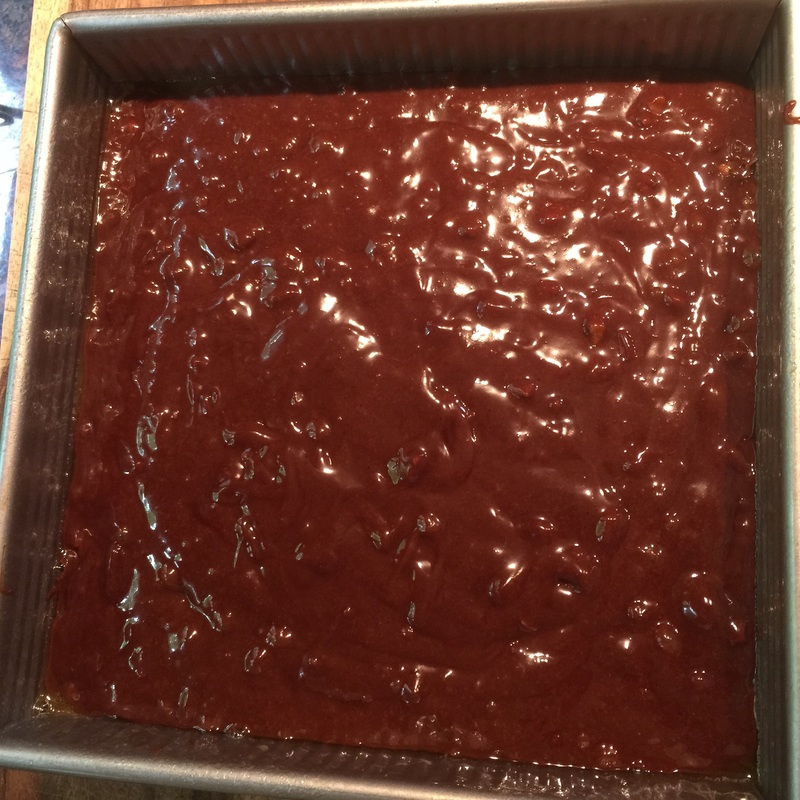
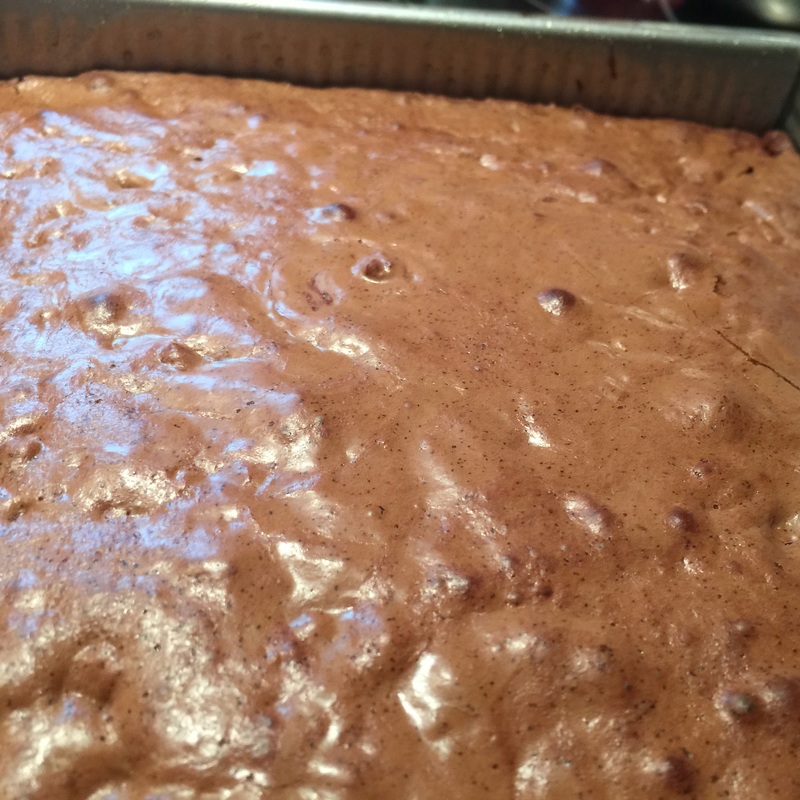
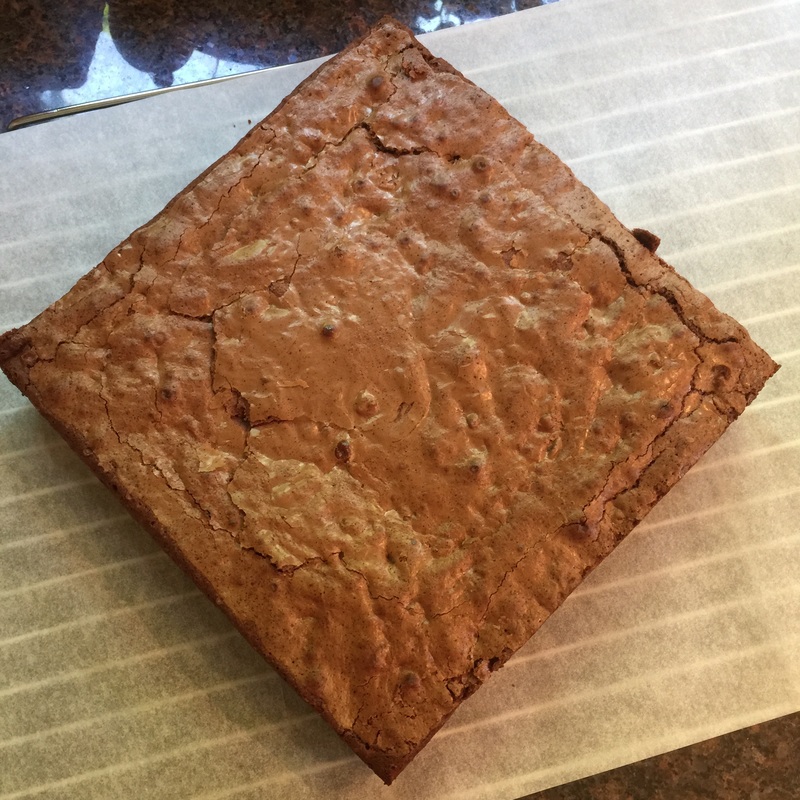
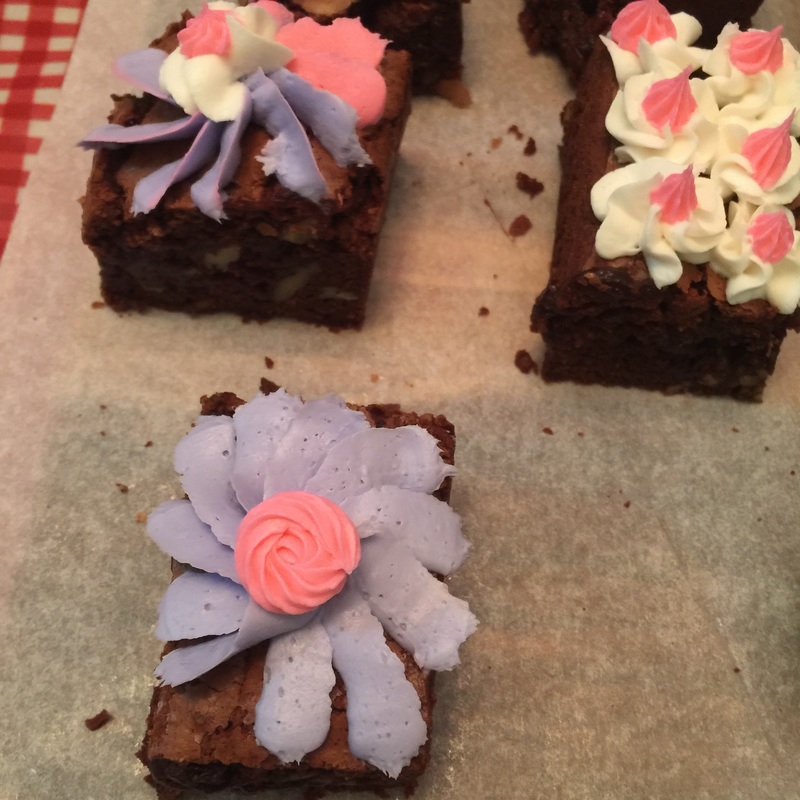
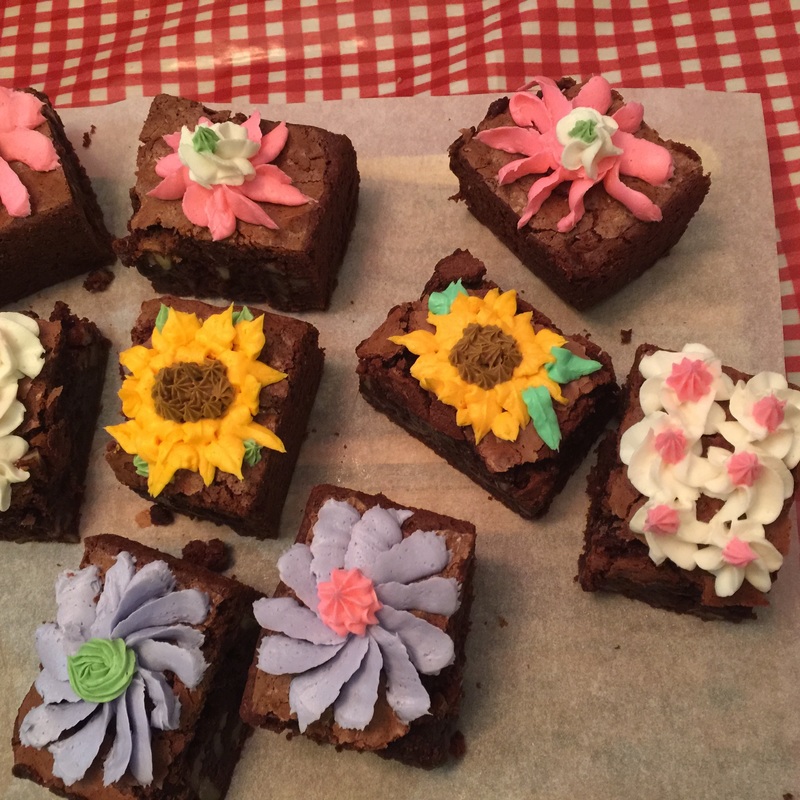
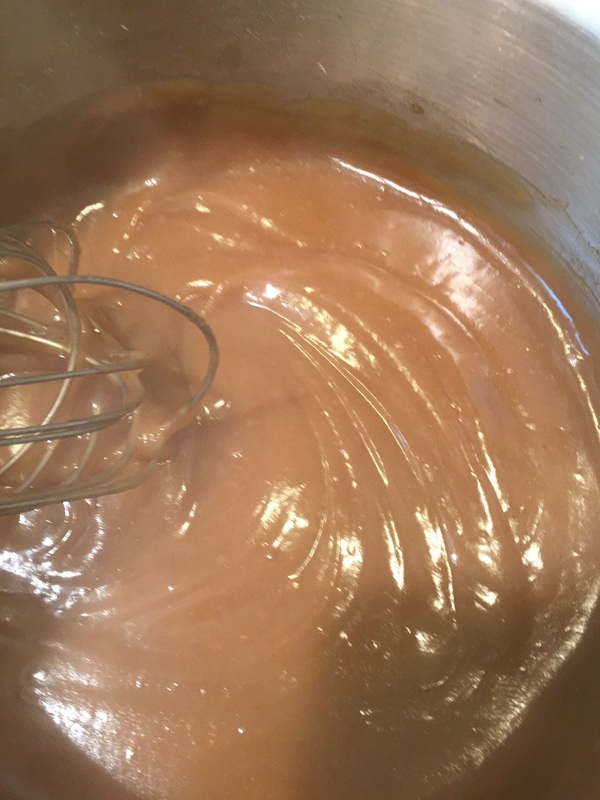
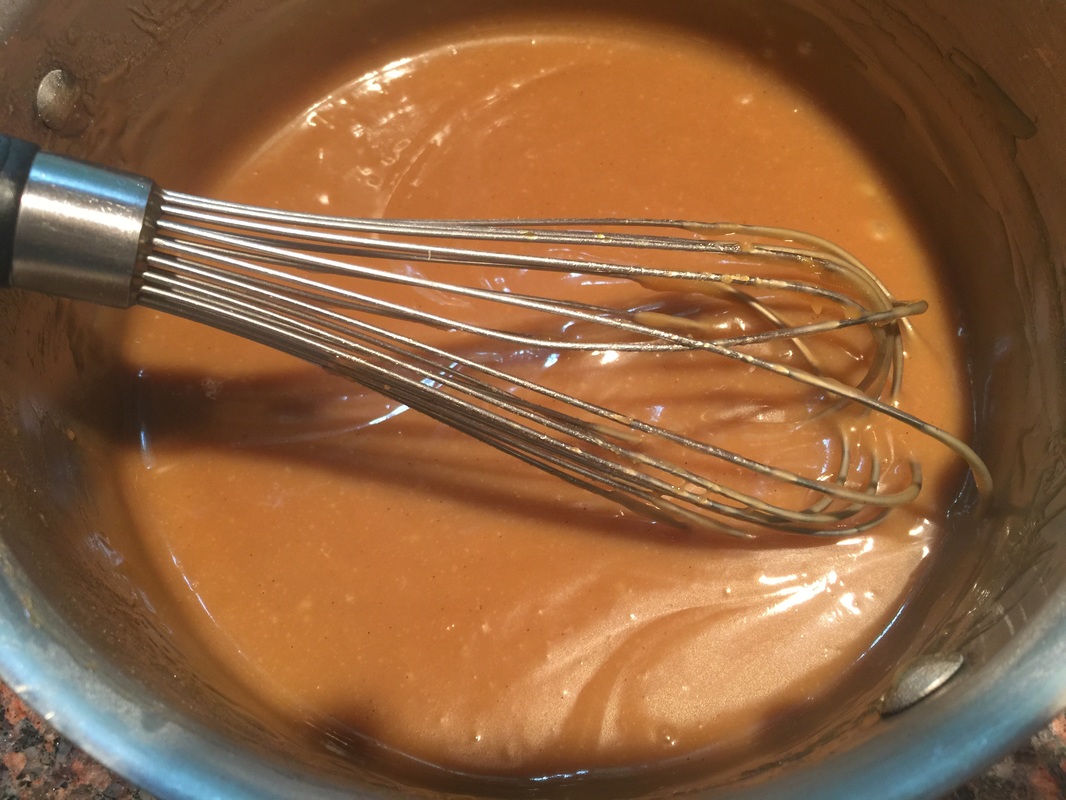
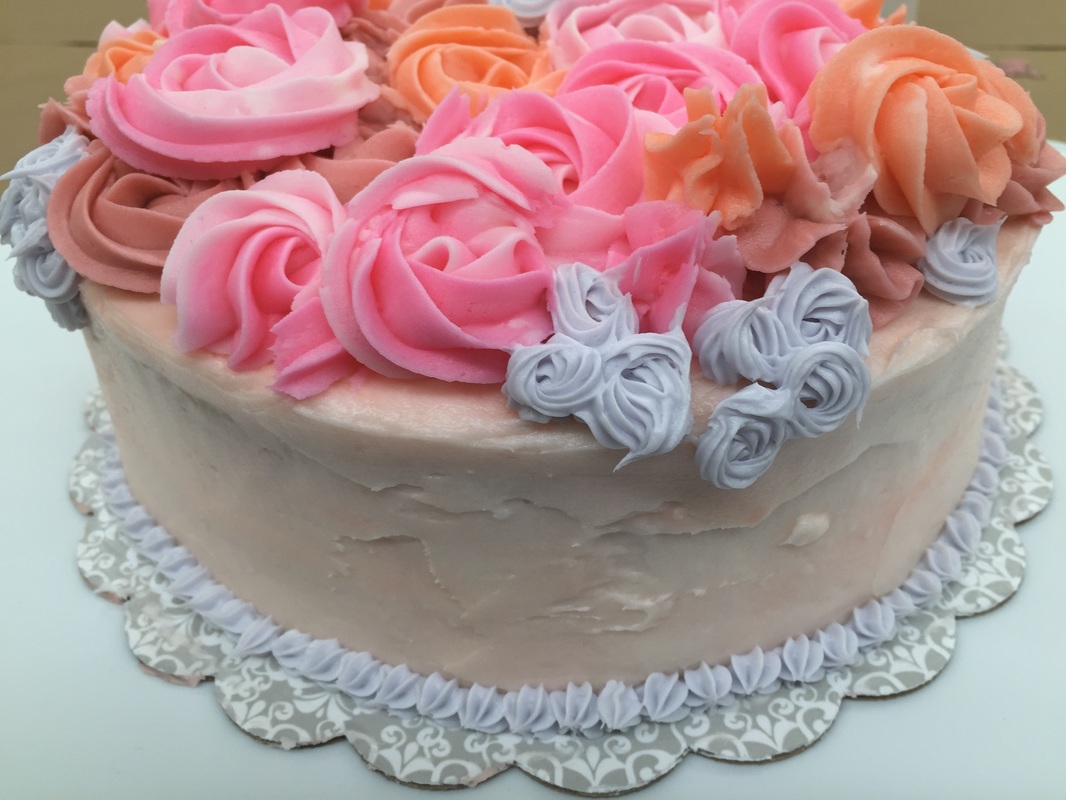
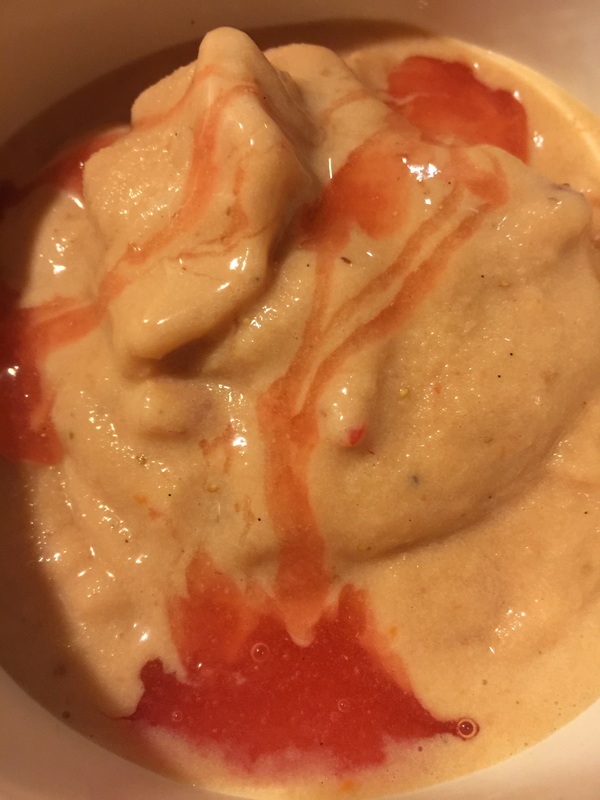
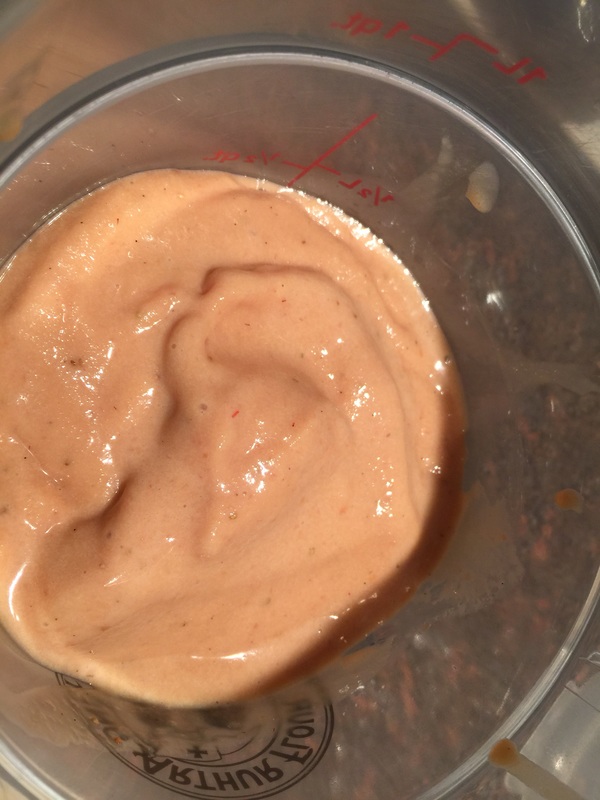
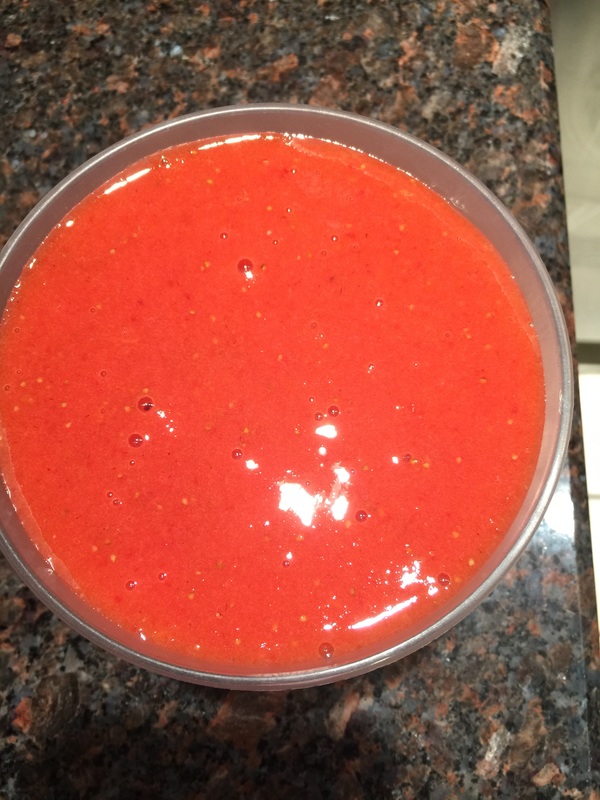
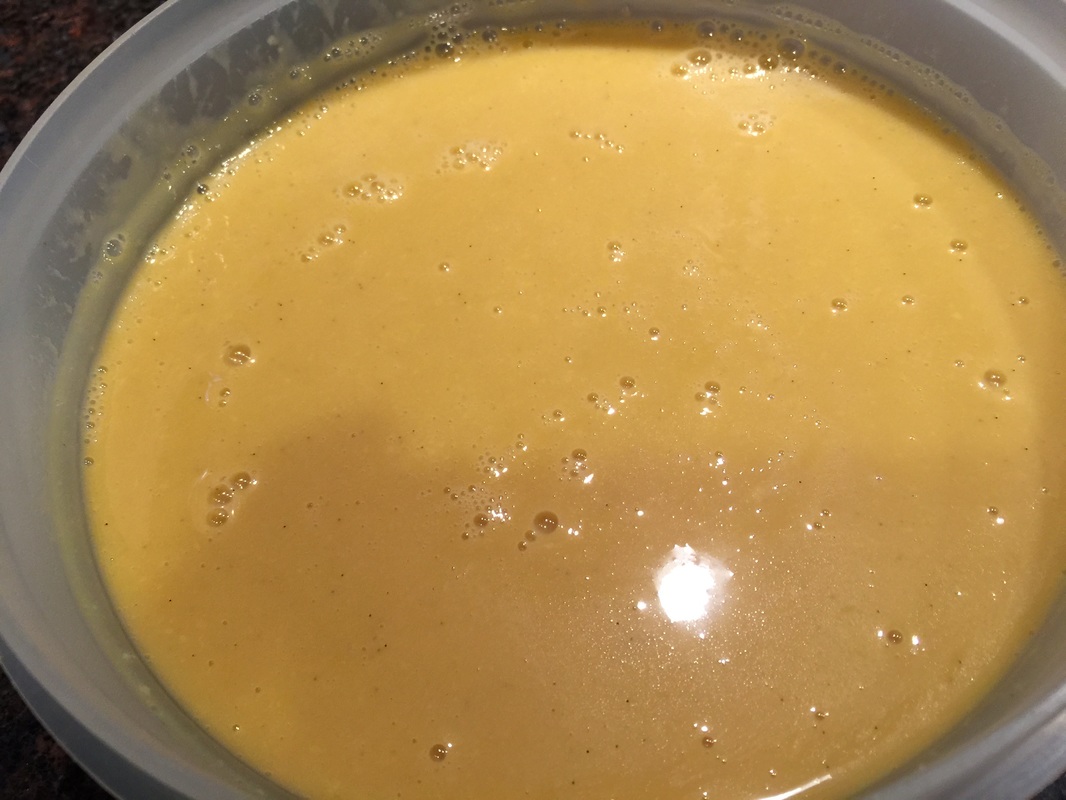
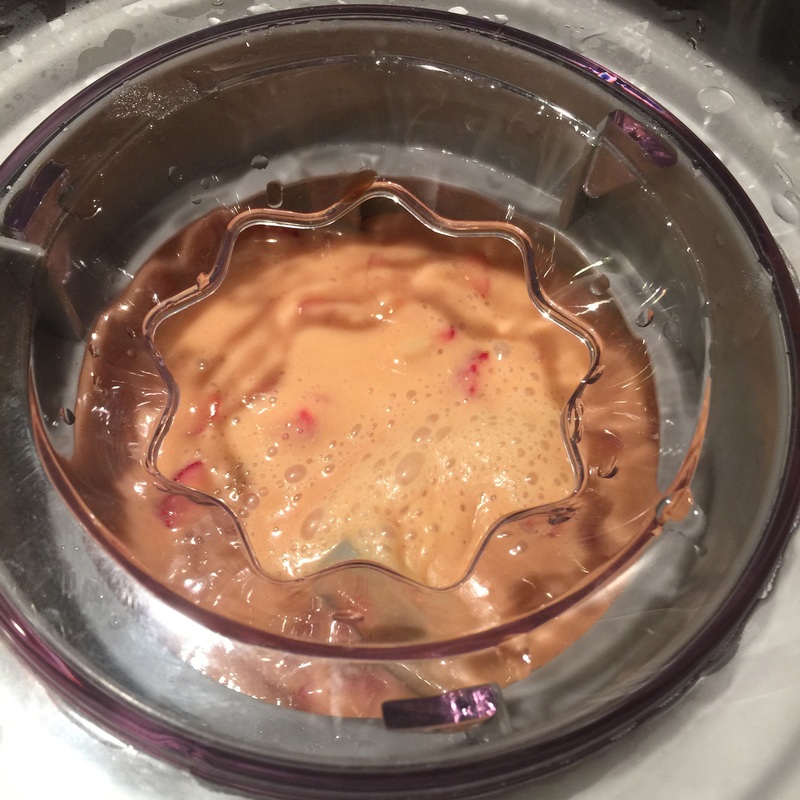
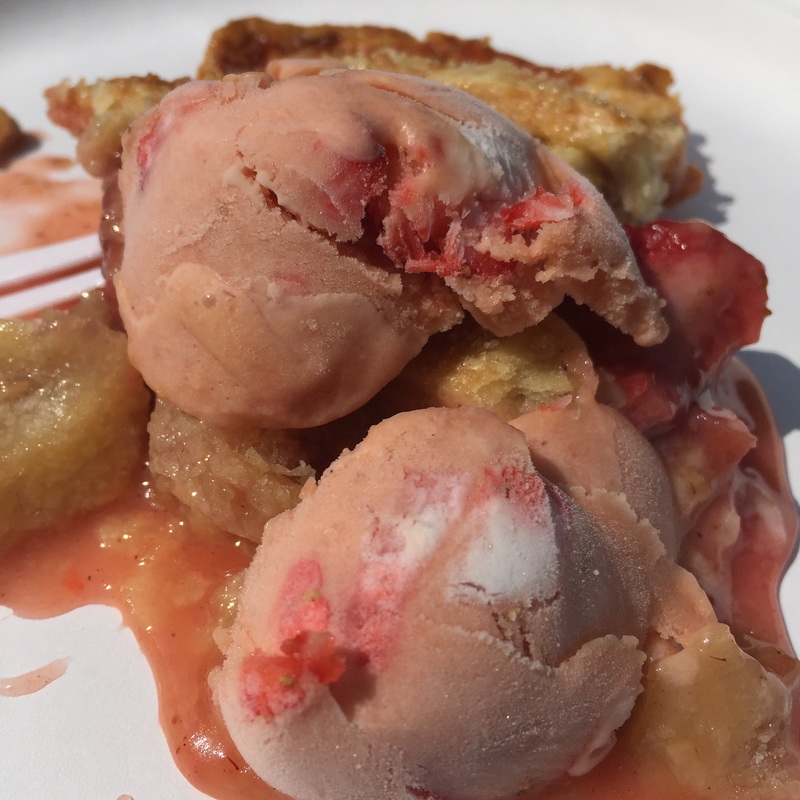
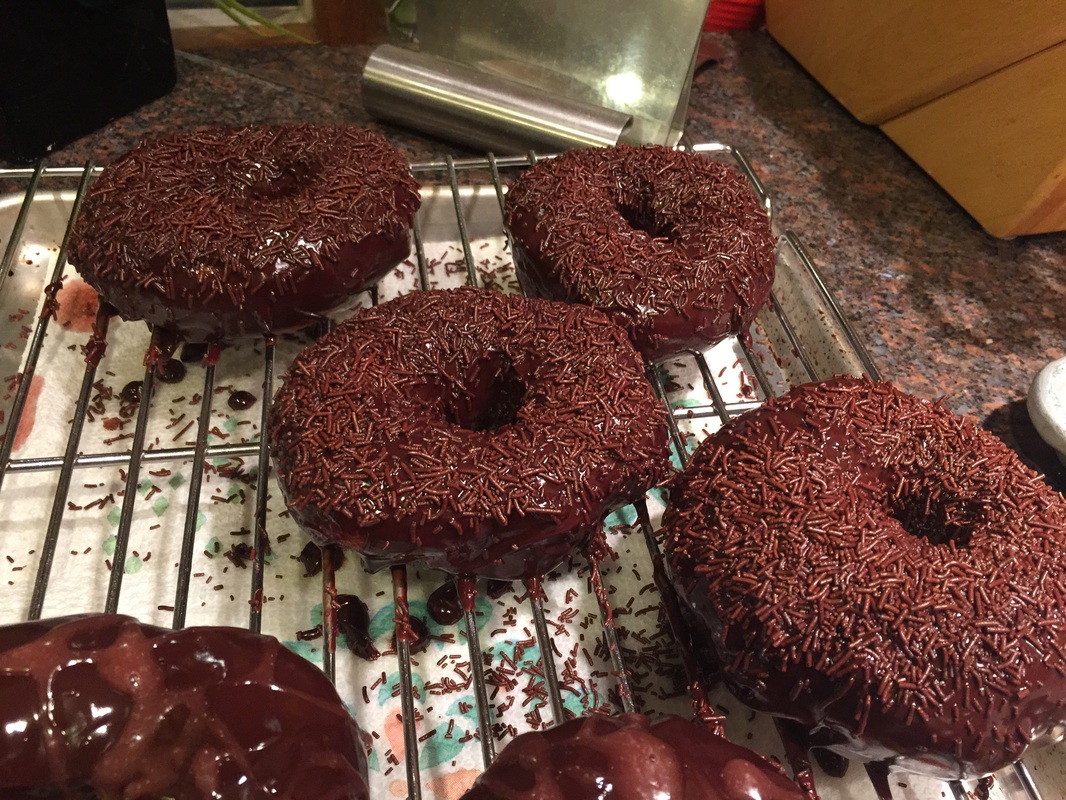
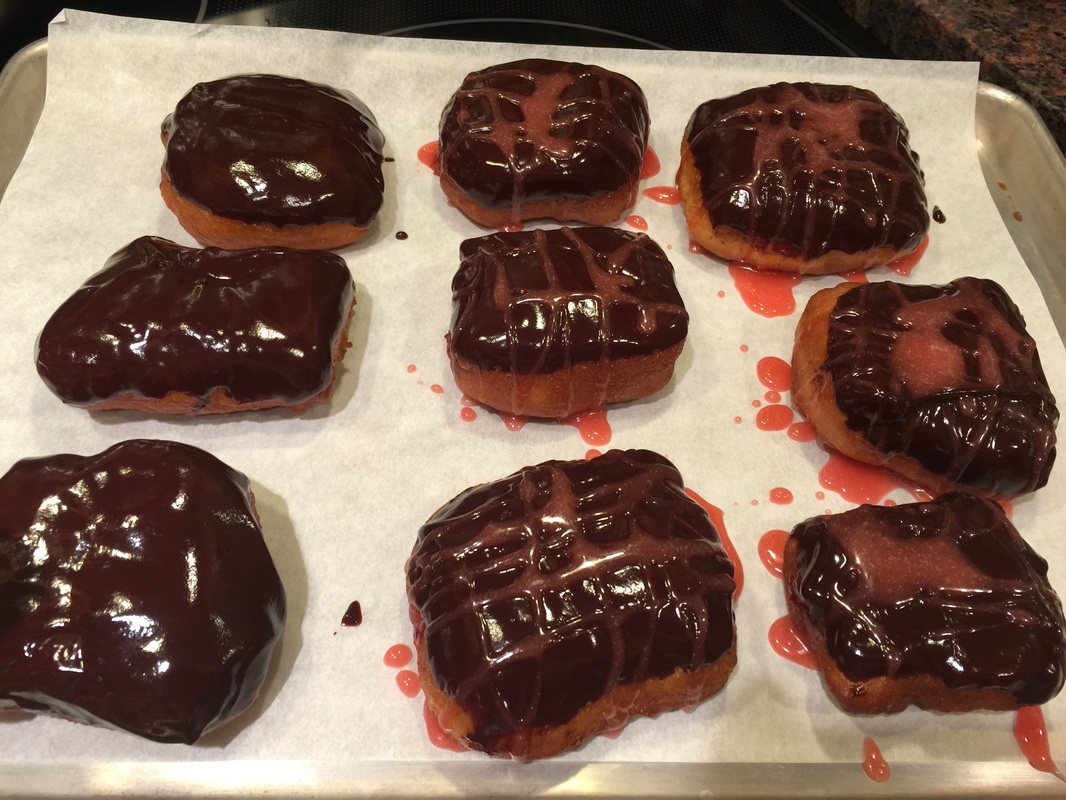
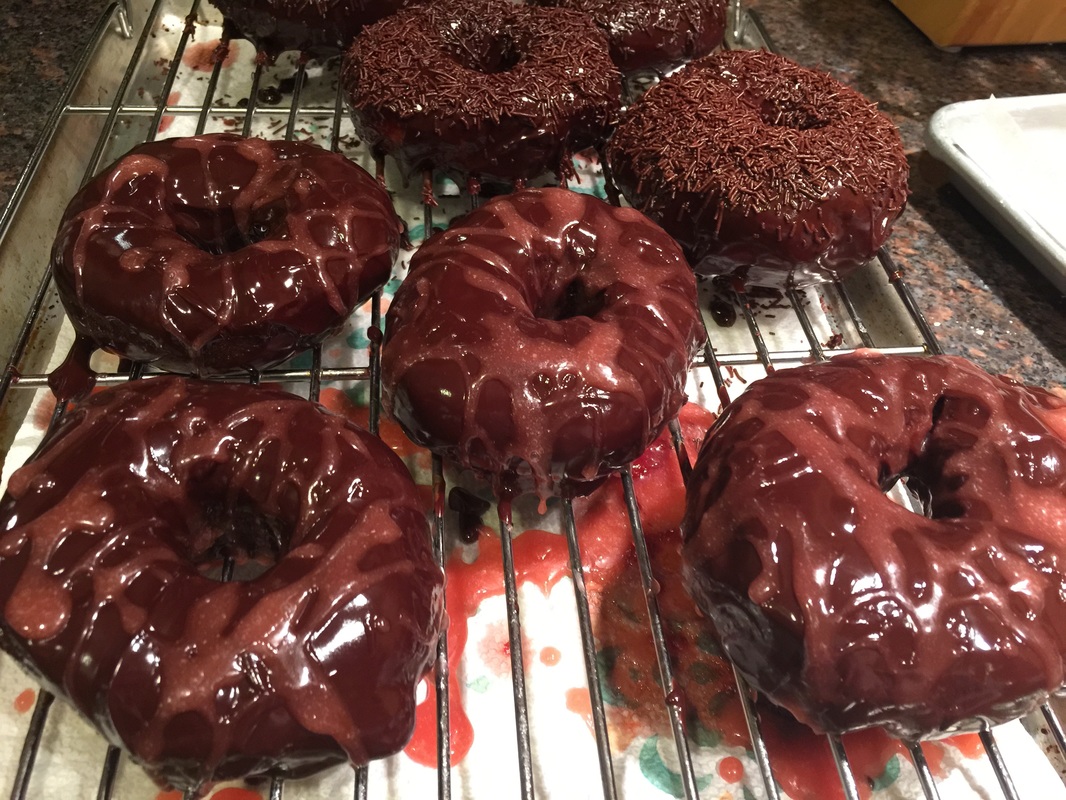
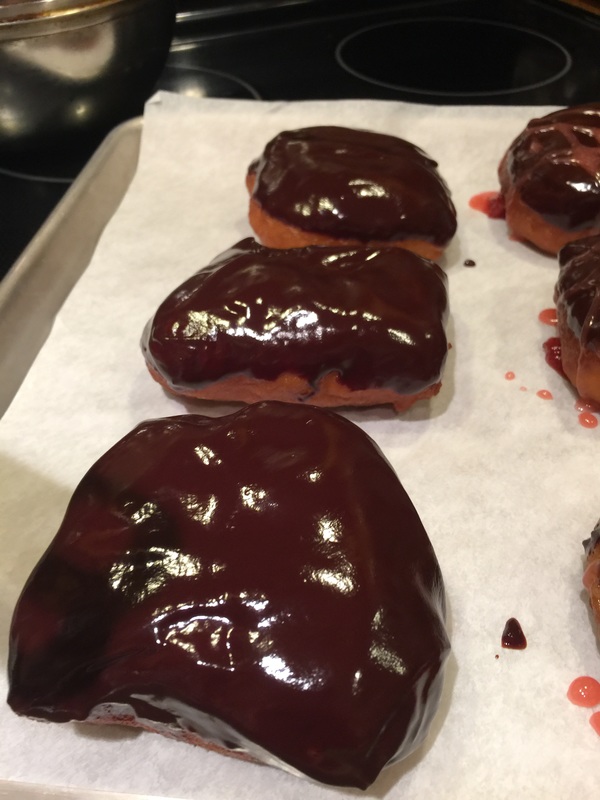
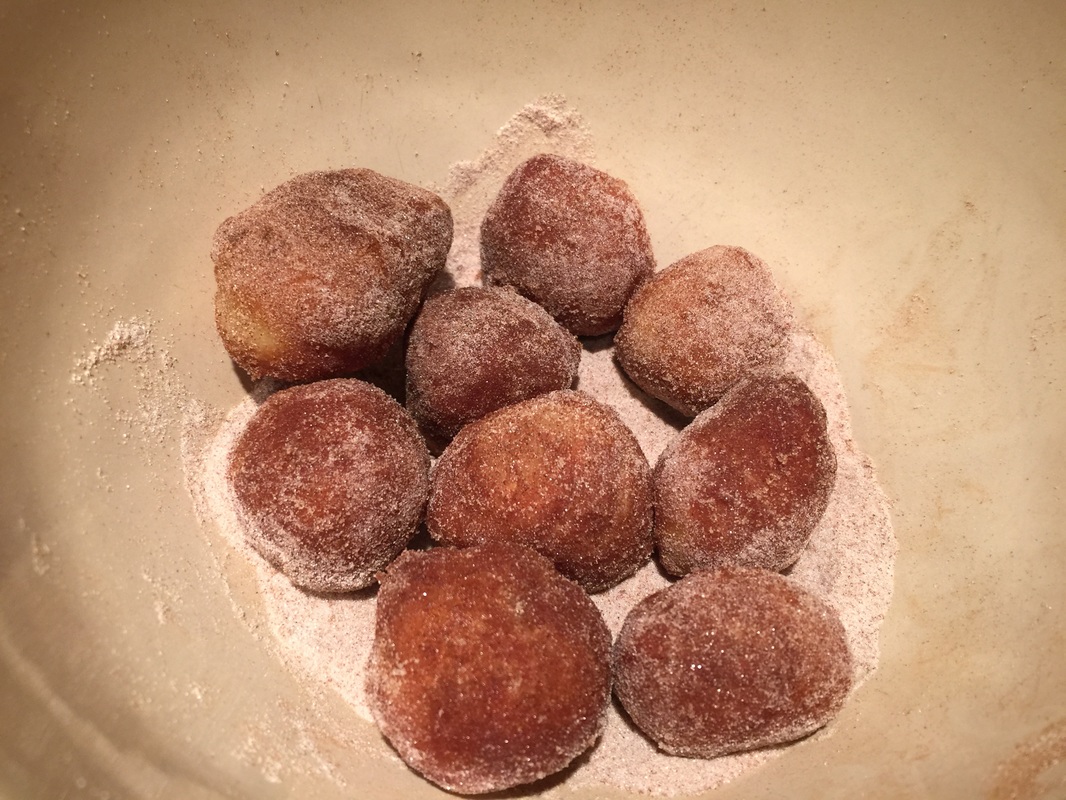
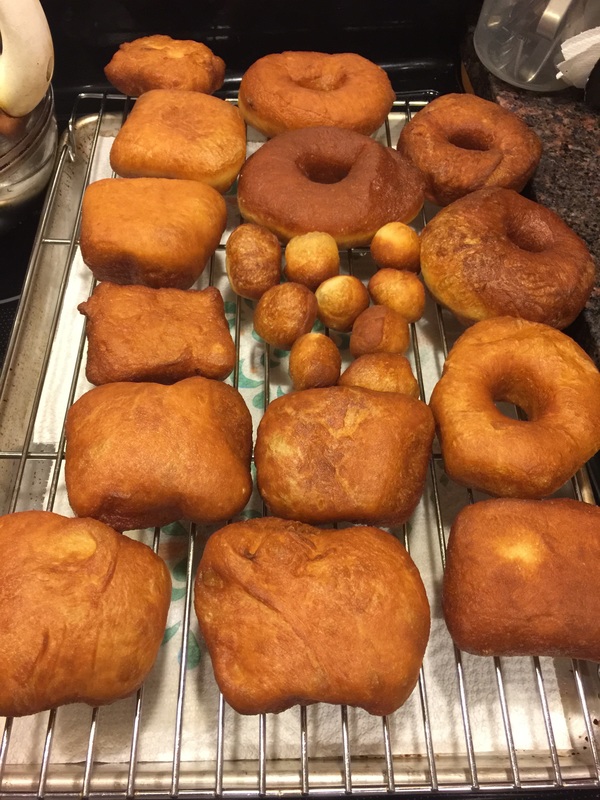
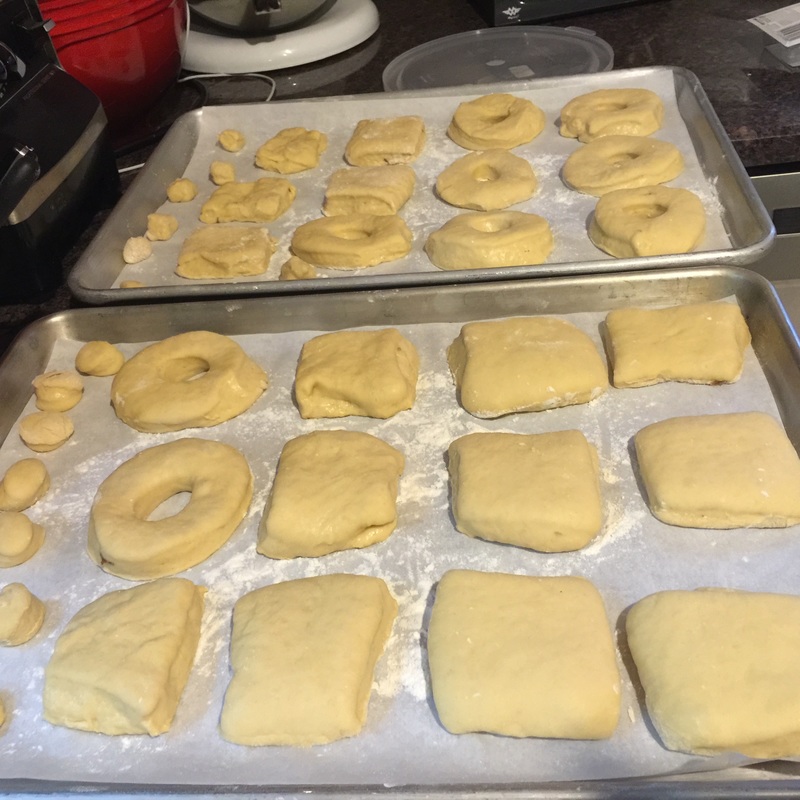
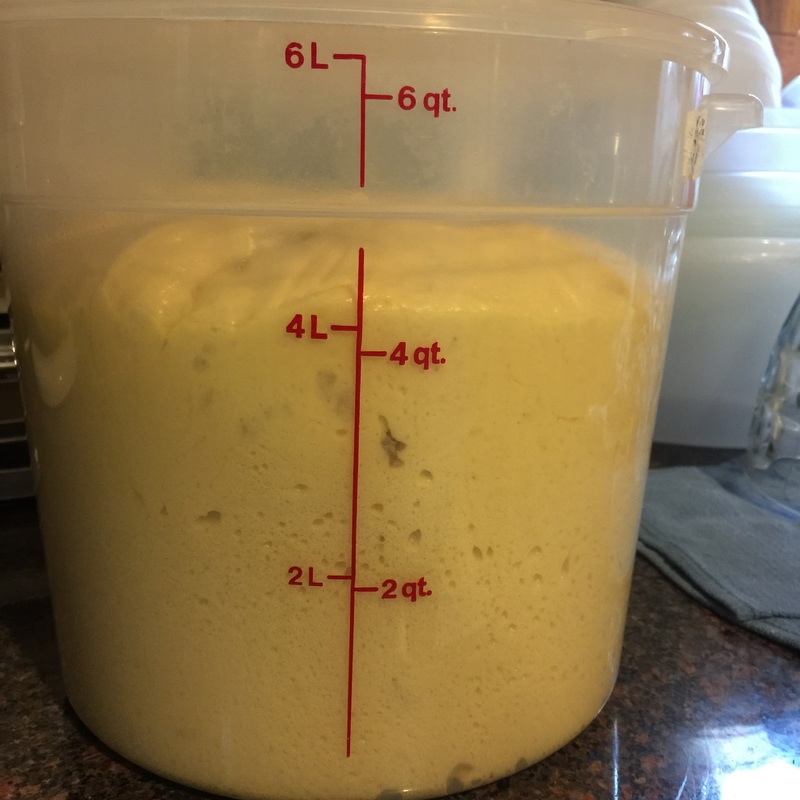
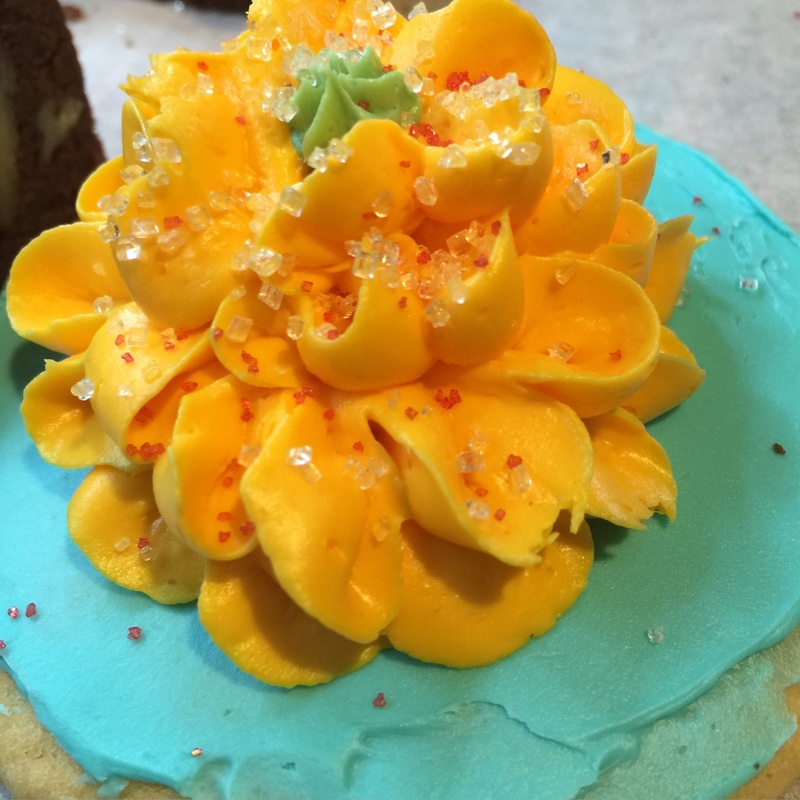 Buttercream Zinnia piped onto a sugar cookie and topped with red and clear sanding sugar I'm taking a cake decorating class. It's four weeks long and the last session required me to bring small "treats" to decorate. So, I made both Brownies and sugar cookies. Sugar cookies are a tricky business. They can either be really dry and hard to eat without copious amounts of milk, or they can be so sweet that you can't get past the second bite, or, they are so thin that decorating them is a major challenge. If I plan to ice and decorate a cookie, I'll make the cookie batter less sweet, so that the sugar in both the cookie and the icing is balanced and doesn't leave me with a cloying dessert. Now, when I make cookies that I plan to decorate, I try to roll them thicker than the average, undecorated cookie so they can withstand the baking, cooling and decorating process without breaking. Have you ever bought a cookie cutter that just looked so cool, until you tried to use it - and there is always one small corner that breaks off? This is exactly what I wanted to avoid. I chose a recipe from Sally's Baking Addiction because it was designed for decorated cookies. I modified her recipe to make it dairy free by replacing the butter with earth balance buttery sticks. I also rolled my cookies to about 1/3-inch thick, which is much thicker than her delicate cookies. I did that because I needed at least a 3" flat surface to decorate for my class. We were planning to use buttercream icing (not common for cookies) instead of royal icing (most common on cookies), and so I wanted to make sure the cookie could hold up to the decorations.  Brownies can be the most decadent treat ever. The right brownie is rich and fudgy but not so dense that it loses cake-like crumb. If you compare a dozen brownie recipes side-by-side, you will notice that there are not many ingredients: butter, flour, eggs, baking powder, salt, vanilla, and of course, chocolate. There are two camps when it comes to adding chocolate in brownies -- cocoa powder or semisweet dark chocolate. I have found that cocoa powder based recipes tend to be more cake-like than fudgy (even the ones that claim otherwise). They make a great brownie - but it's a different kind of brownie than the recipes that actually call for chocolate. Now, once we dive into the realm of chocolate - we see lots of variations: chocolate chips, semisweet chocolate, unsweetened chocolate, etc. Since chocolate is the star of the Brownie show, I prefer to work with the highest quality semisweet dark chocolate I can find. In this case, I used 66% semisweet Valrhona chocolate. I needed to bake a batch of brownies for my cake decorating class last week. These were based on a recipe that first appeared in Gourmet Magazine many years ago. I think that it's my favorite brownie recipe (of all the recipes I have tried to bake). Fortunately Epicurious.com still keeps a copy online. Of course, the one major difference between my version and theirs is that I use the Earth Balance buttery sticks instead of butter. I also used pecans instead of walnuts. One very important tip for making this brownie recipe is that after you have whipped your eggs, sugar and vanilla together, and you have your hot melted chocolate and butter combo - if you just pour the chocolate into the eggs, you will cook the eggs - scrambling them and ruin your brownies. So, what I like to do to temper them is turn the mixer on medium-high speed and one spoonful at a time, slowly add the chocolate into the egg mixture while it's spinning. It's tricky because if you are not careful - chocolate will go flying everywhere and create a giant mess. You have to pour it slowly about 1 inch from the edge of the bowl. I will usually add about 3-4 spoonfuls in, making sure they are well combined, before slowly pouring in the remainder of the chocolate. A few other important tips... the usual toothpick method of testing to see if a cake is done never works with brownies because the chocolate is still hot and if you waited for the toothpick, they would be over baked. So, you have to watch and see when the brownies start to pull away from the sides of the pan. They should feel taut and not loose (like batter). It's approx. 35 minutes for one 8-inch square pan of brownies at 350-degrees. Last but not least. The cooling process is critical. You have to wait for the chocolate to set-up. So, make sure the brownies are completely cool before cutting into them. I like to cool them by first waiting about 5-10 minutes before un-molding them from the pan. I do that by placing a sheet o parchment paper on top and then the cooling rack underneath the parchment, then quickly flipping the pan over, so the "top" of the brownies is now on the bottom, on a sheet of parchment. Then I add another sheet of parchment paper on top and let it cool until it's completely room temperature and there is no residual warmth. In this instance, I decorated them too :)  Butterscotch Meringue Pie When I was a little kid, my family would get together and go out to eat at these all-you-can-eat buffet restaurants. In hindsight, it made sense. There were a lot of us, and a good number of children when you added my cousins to the mix. At the dessert table, there were always all sorts of puddings. One of my favorite was the butterscotch pudding. It was creamy, rich and buttery and it melted in my mouth. My mother never made it at home. In fact, her idea of pudding was always from a box. The only pudding she actually made from scratch was rice pudding -- and that's the topic of another blog. So the butterscotch was a special treat that we only had once in a blue moon at the buffet. I had not thought about or even remembered butterscotch pudding until a few weeks ago, when I started taking Nancie McDermott's Pie class on Craftsy. She demonstrated how to make the butterscotch pie from scratch and it brought back wonderful memories of my childhood. As soon as I saw her make it, I knew I had to try it. Let me tell you, it did not disappoint! I found a published version of the recipe on Nancie's blog. Of course I needed to convert it to a dairy free version. The recipe called for evaporated milk. Well, I would have to make that. I took 1/2 coconut milk and 1/2 almond milk and put it into an oven proof glass bowl. I baked it on 175 for about 3 hours, let it cool off and stuck the finished product in the fridge. Next, I made a 9" pie crust using Earth Balance buttery sticks and blind baked it (first 5 min with pie weights/ remaining 10 min by itself). Then I moved on to the sauce. I followed Nancie's instructions - cooking the brown sugar, flour and evaporated milk on the stove top over medium to high heat until it formed a thick almost paste-like consistency. Then I tempered my beaten egg yolks and combined them with the sauce off the heat. I cooked it for a minute or two whisking aggressively (so as not to scramble my egg yolks) and then took it off the heat, added the Earth Balance buttery sticks, and then finally the vanilla. As the pie cooled, I moved on to my meringue that I made with my reserved egg whites. I took it to soft peaks, adding sugar to the mixer one tablespoon at a time until i had nice, but still a little floppy, soft peaks. I topped the pie with the meringue, fluffed the top a bit, and stuck it back into the oven. For the last 2-3 min, I put it under the broiler. Now it's cooling until I bring it to a friend's house tonight. 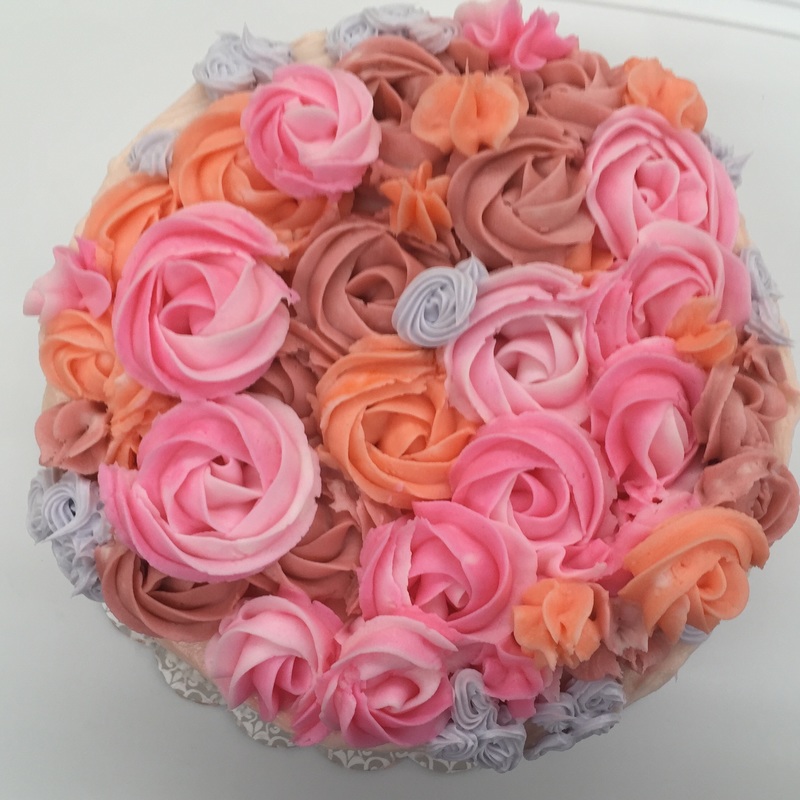 Almond cake, brushed with ameretto simple syrup, filled with frangipani, slivered almonds, and vanilla apricot preserves, and decorated in rosettes made from apricot buttercream Last Sunday was the second week of the Wilton cake decorating course that I've been taking. We were required to bake a cake, and to make A LOT of icing. Now, when I think about making a cake, the first thing I want to do is make it taste good. I also knew that I would be making this cake to celebrate my brother's belated birthday and he doesn't like chocolate, so I needed to work with a different kind of flavor combination. My second challenge is that I needed to use the basic Wilton Cake recipe -- and I needed to convert it to a dairy free option. Well, I baked that cake using almond extract (although I really wanted to make a proper almond cake) and I swapped out the butter for Earth Balance and the milk for coconut milk. I sifted my cake flour and followed the recipe (otherwise) exactly. The cake came out extremely dense, but still tasty. I didn't have time to re-bake it before class, so I needed to work with what I had. For the Icing, I made an apricot flavored buttercream (again the Wilton recipe compared to the amazing meringue based buttercreams that I prefer to eat) using apricot extract. I would have much rather used real apricot puree in my icing, but that was not allowed in the course instructions -- we needed to use their recipe unaltered. I at least got to work with Non GMO vegan shortening and sugar, so I could feel better about it. I did prepare some tricks to make the cake shine a bit more. First, I mixed a batch of vanilla simple syrup with amaretto and brushed the cake with the syrup. Then I made some frangipani to fill the cake with, and I added a layer of slivered almonds in between the frangipani and preserved apricots in vanilla syrup (like a thick jam with whole apricots). When I got to class, I had a vision of how I wanted to decorate the cake. I wanted to cover the top of the cake in rosettes and make a star border at the bottom, with smaller rosettes dripping over the sides. Near the end of the class, when the instructor went to show us some new techniques, she was going to have us to a picture transfer onto the top of the cake, but I did not want to do that, so I watched their techniques, but went forward with my idea. I learned a few things... first, large rosettes take A LOT of icing, which makes for a pretty cake, but unless you have a lot of layers and other flavors, that icing can overpower the flavor of your cake. Next, 4 layers are much better than two. Frangipani is absolutely delicious (I kinda knew that one already) and going forward, make meringue based buttercream. It's not as cloying as the wilton recipe (which is the same as any supermarket cake recipe) and gives you a much richer and more delicious flavor. When this class is over, my next challenge will be to work with meringue based frostings to get them to medium or even thick consistency. I know it's possible, I just have to learn how to do it. Next week's class is "small treats," like brownies or sugar cookies.  Strawberry Vanilla Coconut Milk Ice Cream on top of Strawberry Rhubarb Pie It's hot outside. A pastry chef friend mentioned something about making non-dairy ice cream (she's amazing at it) and that sounded like a good idea, so I decided to try it. I used the New York Times Master Ice Cream recipe and replaced the heavy cream and whole milk with coconut milk and coconut cream. I also added vanilla beans to my custard as it cooked. Since I didn't feel like waiting hours for the custard to cool, I stuck it in the freezer briefly while I worked on my strawberries. I hulled about a pint and a half of strawberries. I put a pint into the vitamix with lemon zest, juice from 1/2 the lemon and some sugar and pulverized it. The rest I cut into bite sized pieces. We poured the custard and the strawberries into the ice cream machine, and waited for it to freeze. Once it did, we put the bulk of it in the freezer to finish setting up, but we could't wait, we had to try some in it's semi frozen state. We drizzled some strawberry coulis on top and -- YUM!  Chocolate coated yeast donuts with strawberry glaze, in the back is chocolate with chocolate sprinkles I have a dear friend that is home sick with high fever for the past few days. She's just starting to recover a bit and I wanted to bring her something sweet and fun and comforting -- so I decided to make donuts. After playing with Barbara Elsi's sourdough donuts last week, I learned a lot about the texture and donut shaping process. So this time, I was able to keep them closer to their proper shape. Also, I pan fried Barbara's recipe. With this recipe, I deep fried them as traditional donuts. I took Jenny McCoy's donut course on Craftsy and made the yeasted dough recipes in the course materials with four changes: a) I used Earth Balance buttery sticks instead of butter; b) I used almond milk instead of whole milk; c) I used SAF Gold yeast; and d) I used lilac scented sugar that I made last month when the lilac flowers were in bloom. The yeasted dough went CRAZY while fermenting. It started just below 1 quart and rose about a quart every 15 minutes - ending at around 4 quarts before I rolled out my dough. They only needed about 10 minutes to proof before going into the oil. I heated my oil too hot at first so the first few were really dark. But once I got the oil back down to 350F, things went much smoother. For the Jelly - I had actually made strawberry jam that I had canned earlier in the week, so I just used that jam. Filling the donuts was interesting. First, I tried using my filling tip without a coupler in the piping bag. That was a mistake. Jelly went everywhere. So, after setting up bag #2, I used a coupler and I tied the back of the bag so the jelly could only go where I wanted it to. For the toppings - I made four of them:
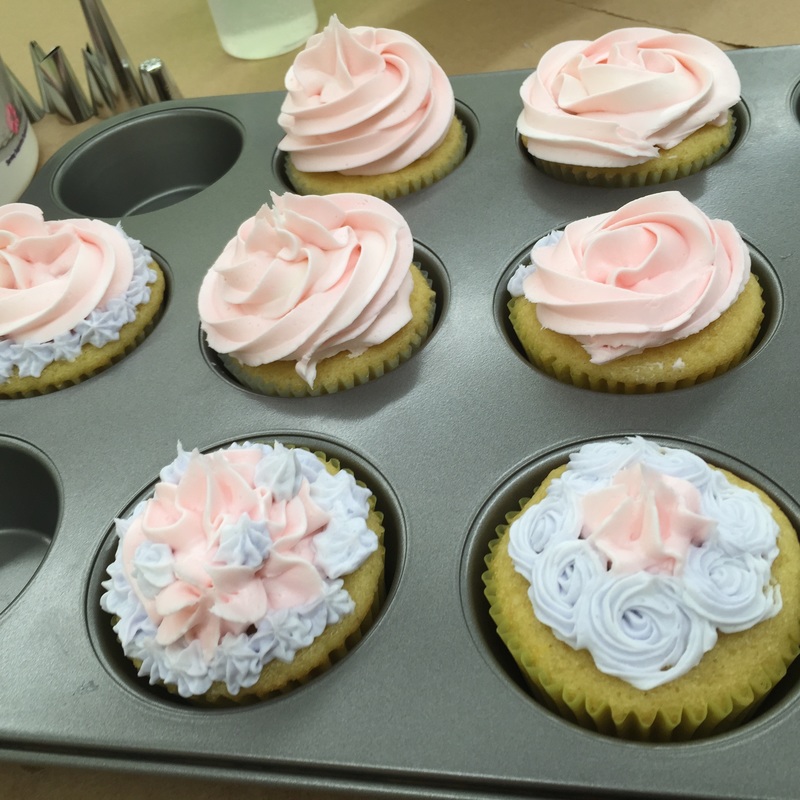
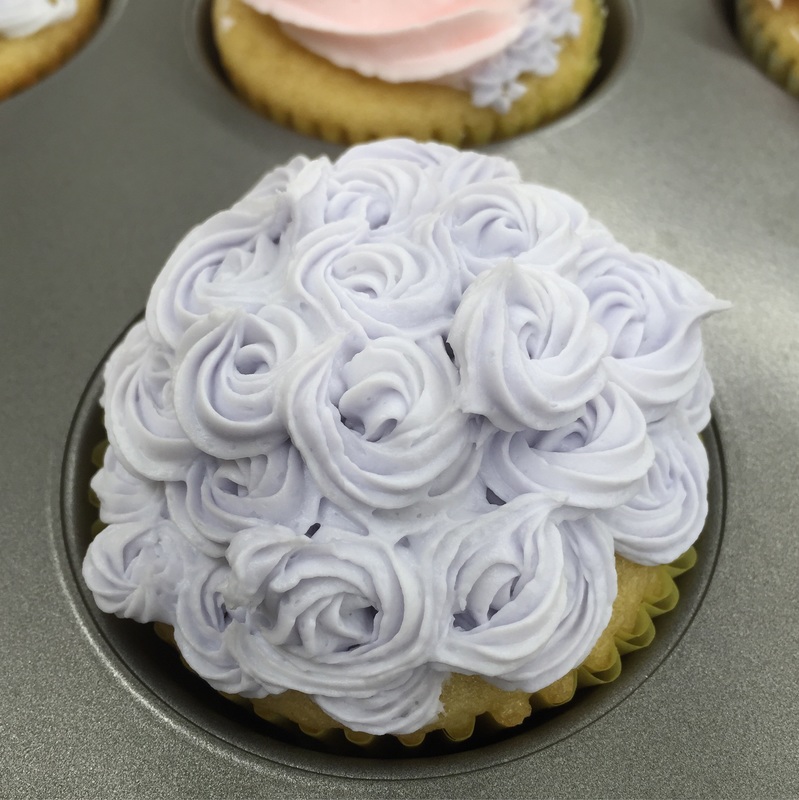
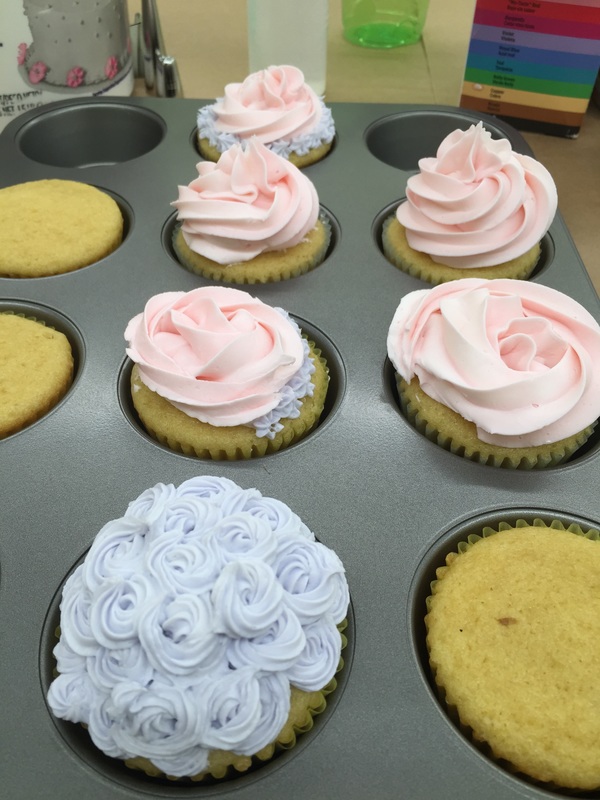
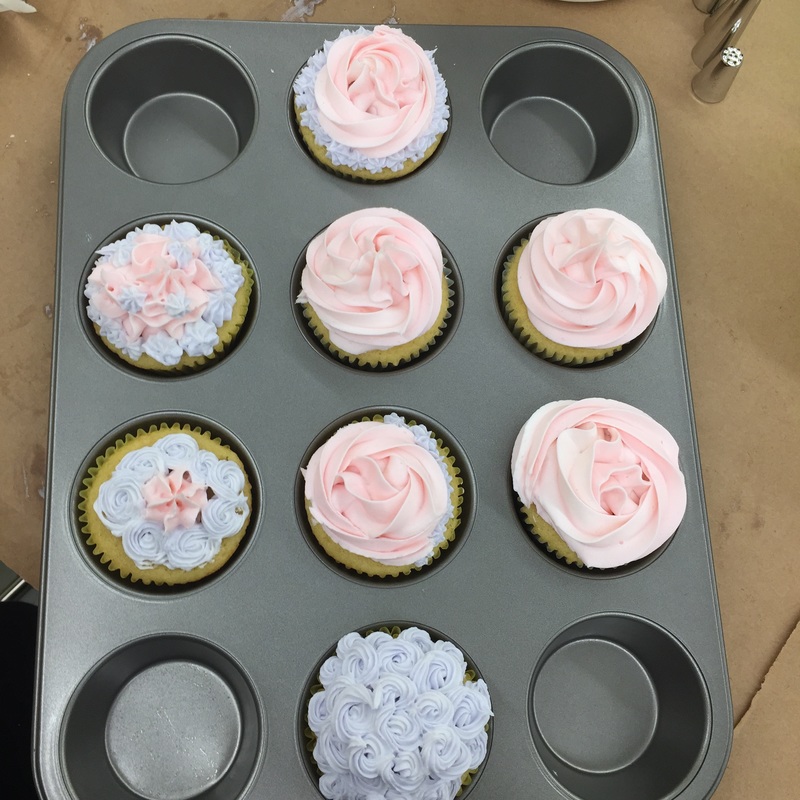
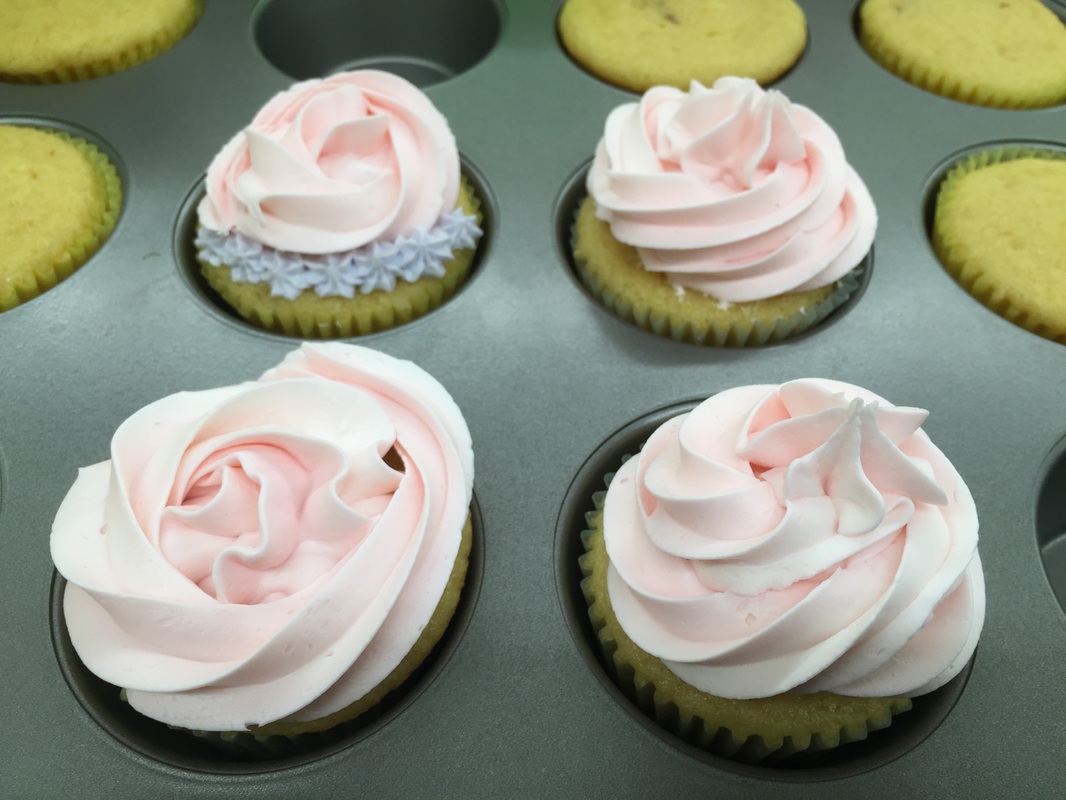
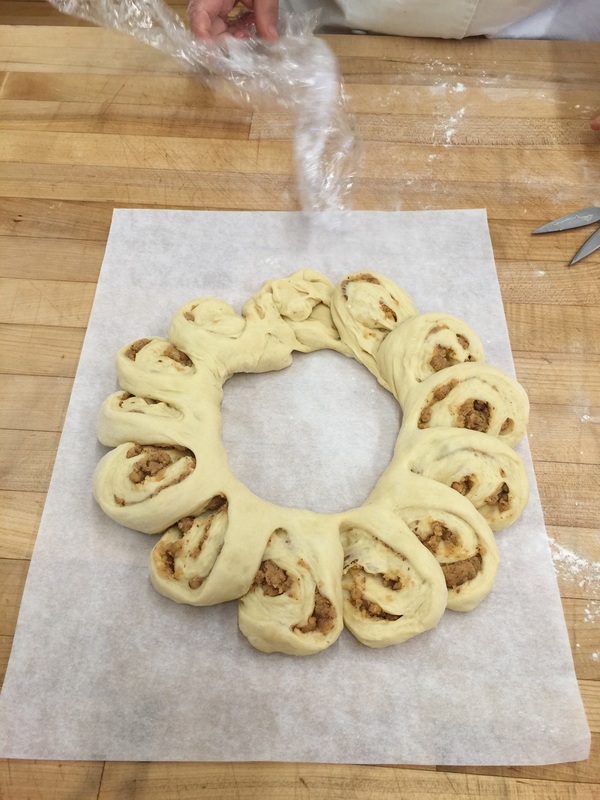
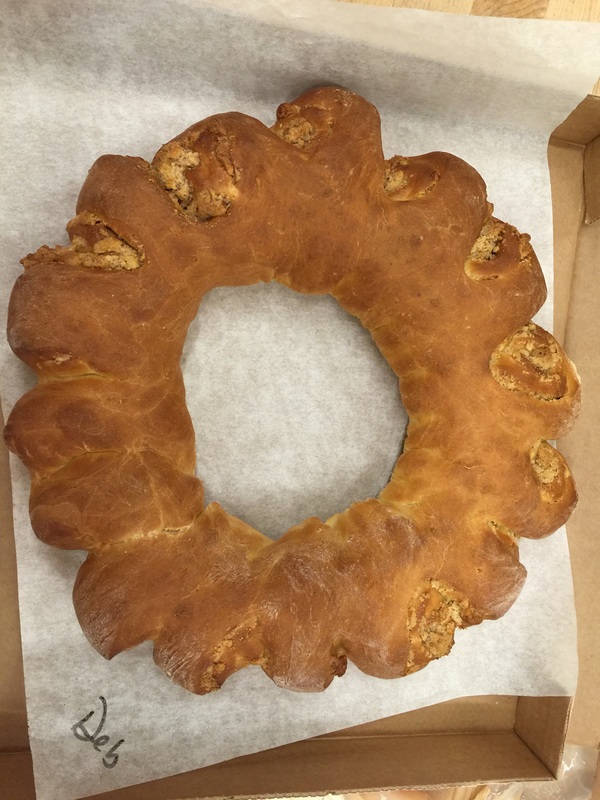
I cut most of the donuts into squares for jelly donuts but I made 40% of the dough into ring donuts. I topped some of them in just chocolate; some in chocolate with strawberry glaze drizzled over them, and some with chocolate and chocolate sprinkles. 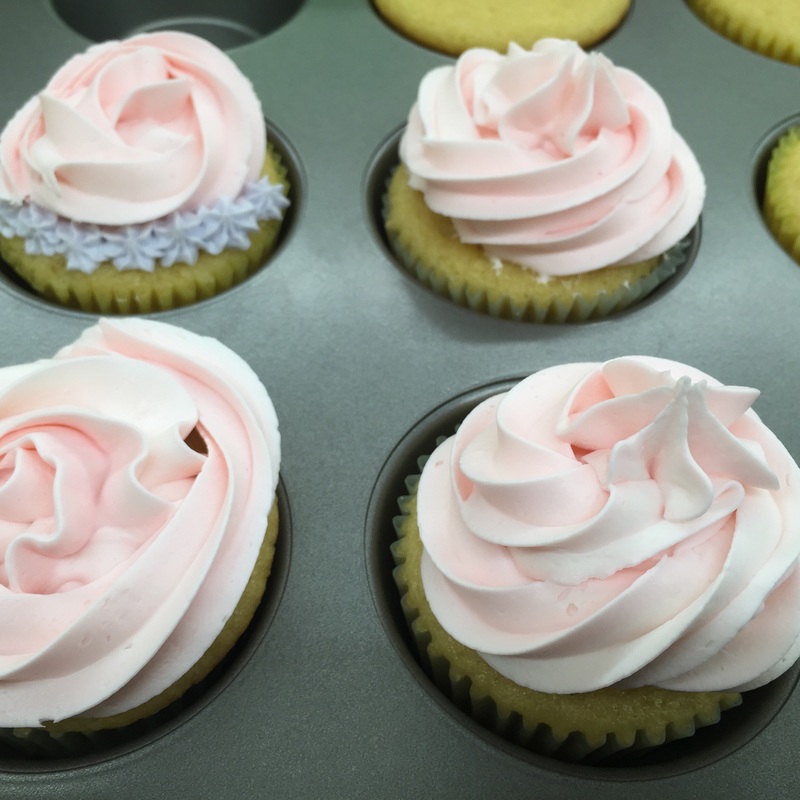 Lilac and Vanilla cupcakes with buttercream frosting I signed up for a cake decorating class. It's a 4-week course at my local craft store. For the first lesson, I needed to bring 6 un-iced cupcakes. I wanted a clean, easy and easy-to-make-dairy free recipe for simple vanilla cupcakes. I found this wonderful Williams Sonoma recipe for vanilla cupcakes. I replaced the butter with Earth Balance buttery sticks and I used my lilac sugar, which by now has a wonderful fragrant flavor and aroma. The cupcakes baked evenly, gave me a soft yet structured crumb and had a lovely combination of the vanilla and the lilac flavor. Now, on to the icing. I signed up for this class because my skills with a pastry bag have always been a little shaky, so I wanted some kind of formal training to make my baked goods look pretty as well as tasty. We really started with the basics, mainly straight lines, wavy lines, stars and rosettes. We mixed two different colors and played around with the star tips. I think I did okay for a first timer... 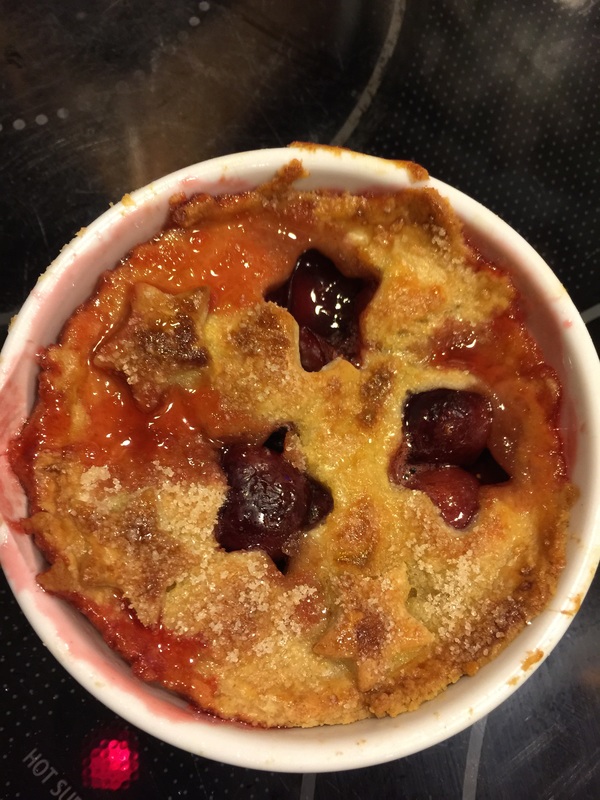 Single Serve Cherry Pie So, this is a dessert made of leftovers. I had some extra pie crust from when I made my strawberry rhubarb pie, some extra jam after making strawberry jam this morning, and I pitted a bunch of cherries, but not enough to make a whole pie. So, I put the cherries into a ramekin and poured the excess jam over them. Then I rolled out the pie crust and cut out star shapes. I painted on a little egg wash, and sprinkled a little lilac sugar on top. Then baked it for 25 min at 375F. 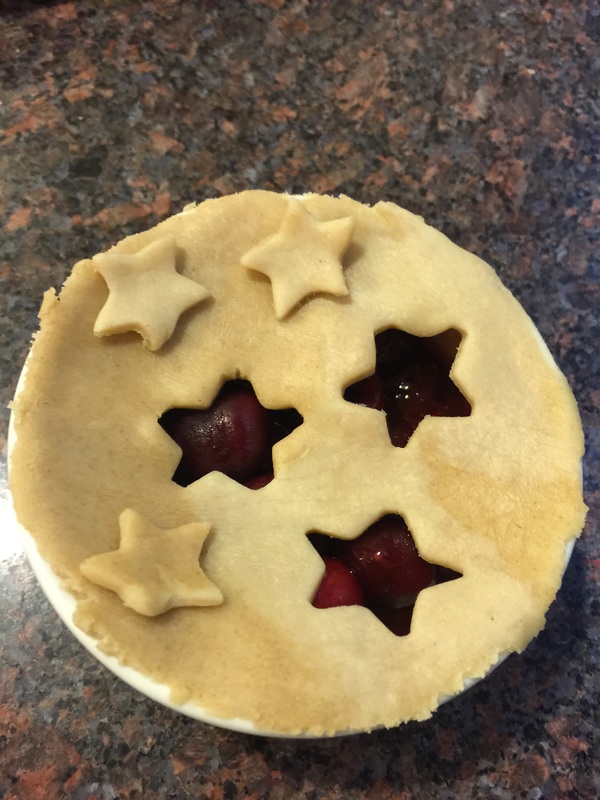 Single serve cherry pie before the bake 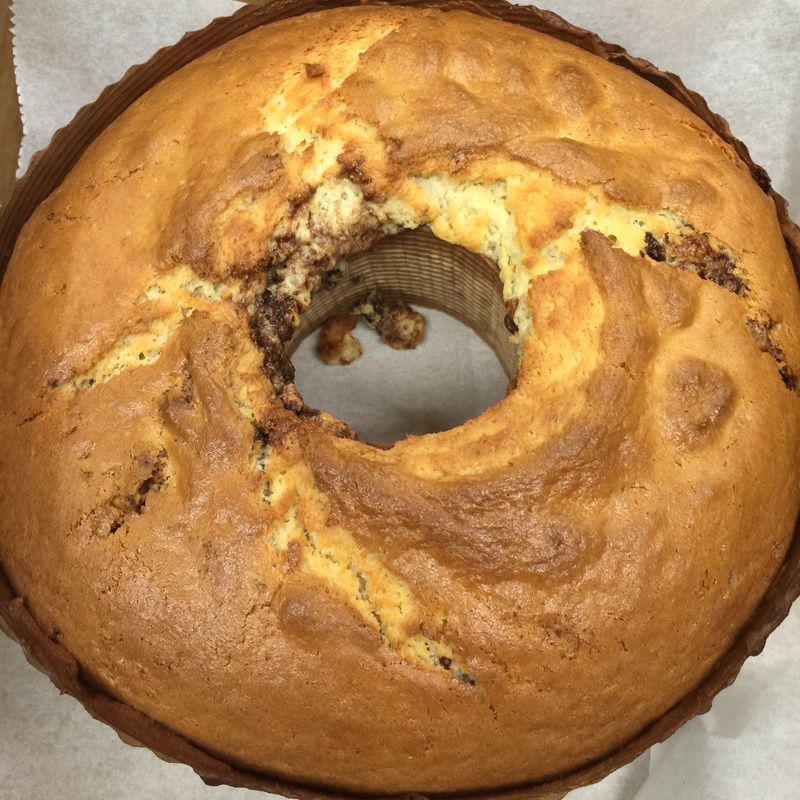 For this class, we made two very different cakes. The first was a sweet, yeasted bread filled with a ground almond mixture. It required two rises – a ferment and a proof – and after the bake, it’s iced with a sugared glaze. I couldn’t find the exact recipe online but this one is pretty close. The second was a more traditional coffee cake batter that we layered with a cinnamon sugar and walnuts filling. This was a fun cake to make and it wasn’t very difficult so we had some fun with it. We created about three layers in a paper tube pan. The process of making the almond ring was very similar to making a babka dough, but without the overnight cold ferment. The filling and shaping process felt very similar until we rolled the dough. Here we shaped the roll into a ring, and then using a pair of scissors, we cut slices into the ring, and twisted each piece so it lays flat on the parchment, forming a “petal” ring. The best part – eating the fruits of my labors. 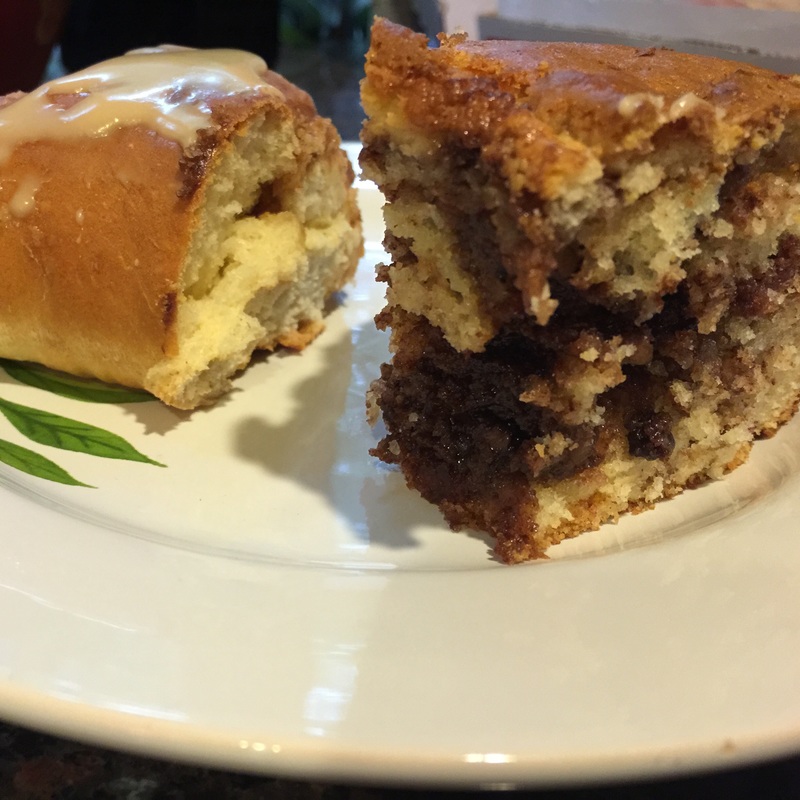 |
DebI'm a home cook with a lifelong passion for learning, exploring and experimenting in my kitchen. You can find me at @Debs1 on Twitter and @Debs121212 on Instagram. Categories
All
Archives
July 2020
|


 RSS Feed
