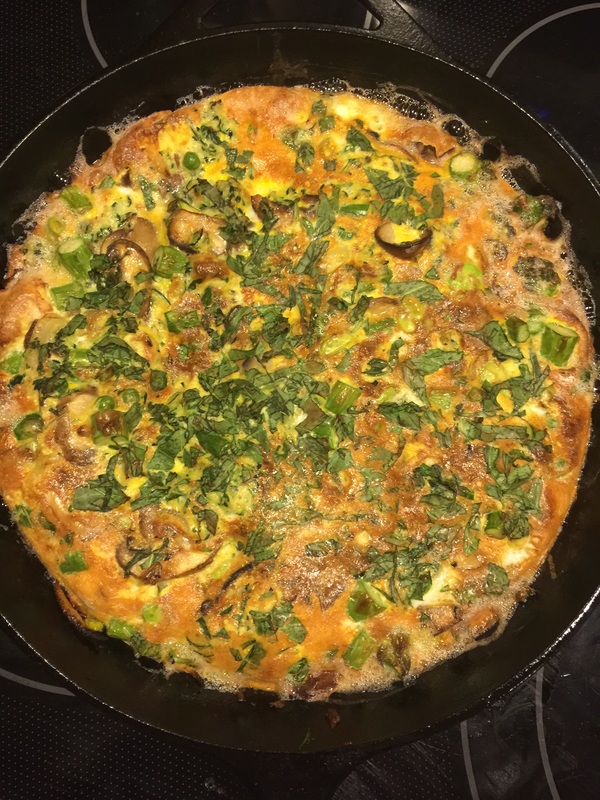
 Vegetarian Frittata Ingredients:
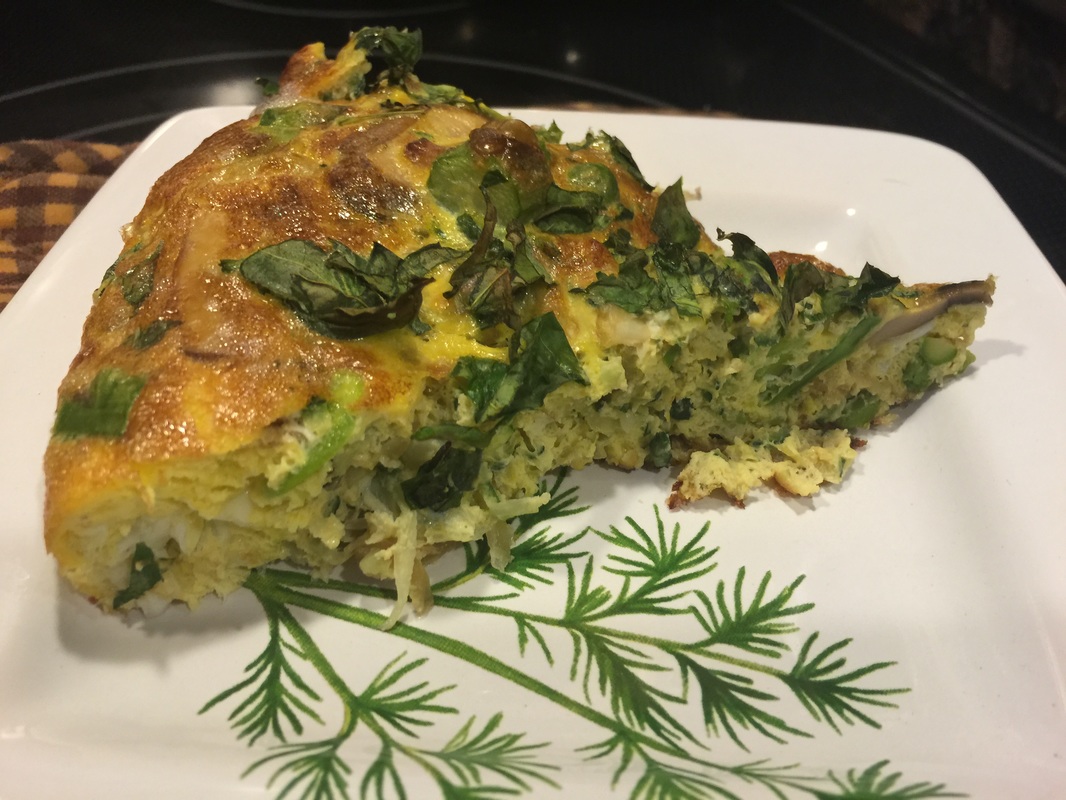 Slice of Vegetable Fritatta
0 Comments
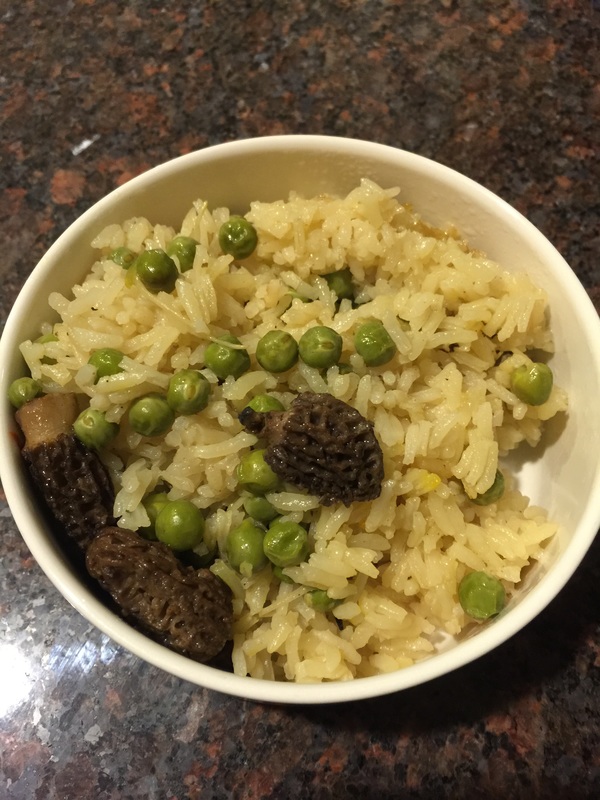 Springtime Rice is made with Morels and peas 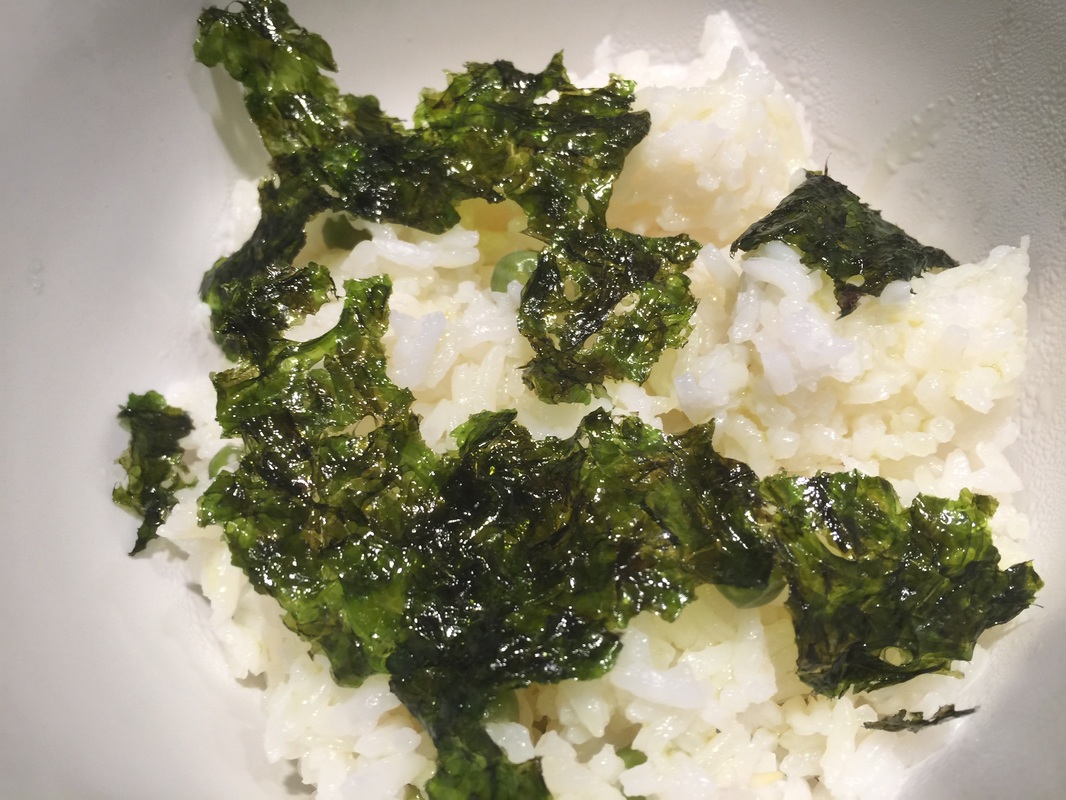 Buttered Rice with Toasted Seaweed Buttered Rice with Toasted Seaweed This morning, I found an article in my Facebook newsfeed from Epicurious called How To Make Dinner in a Rice Cooker. Considering I make dinner in a rice cooker at least once a week, I figured I’d check it out. They have some great ideas in this article – including a few that I haven’t tried. But it inspired me to share some of the simple rice cooker meals that I make. Springtime Rice
Combine in rice cooker, set it and forget it. Buttered Rice With Toasted Seaweed
Enough toasted Nori to mix into the rice Cook the rice, add the Nori to the finished rice in the bowl. (aprox 2 sheets) Coconut Rice Pudding
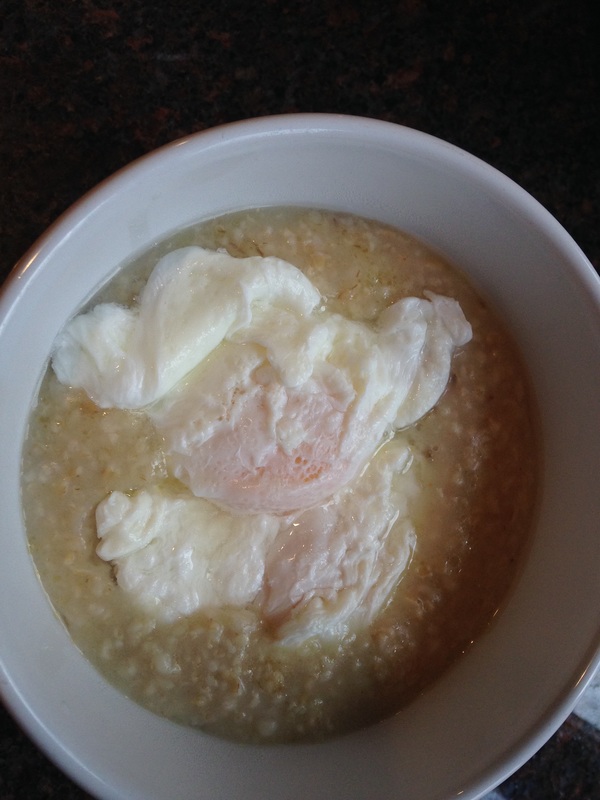
Set the rice cooker, remove the finished pudding and serve. You can serve this hot or cold. Steel cut Oats with Frozen Berries This is a wintertime favorite. I like this when it’s so cold outside that I need something warm and filling with a touch of berries to remind me that summer will come again.
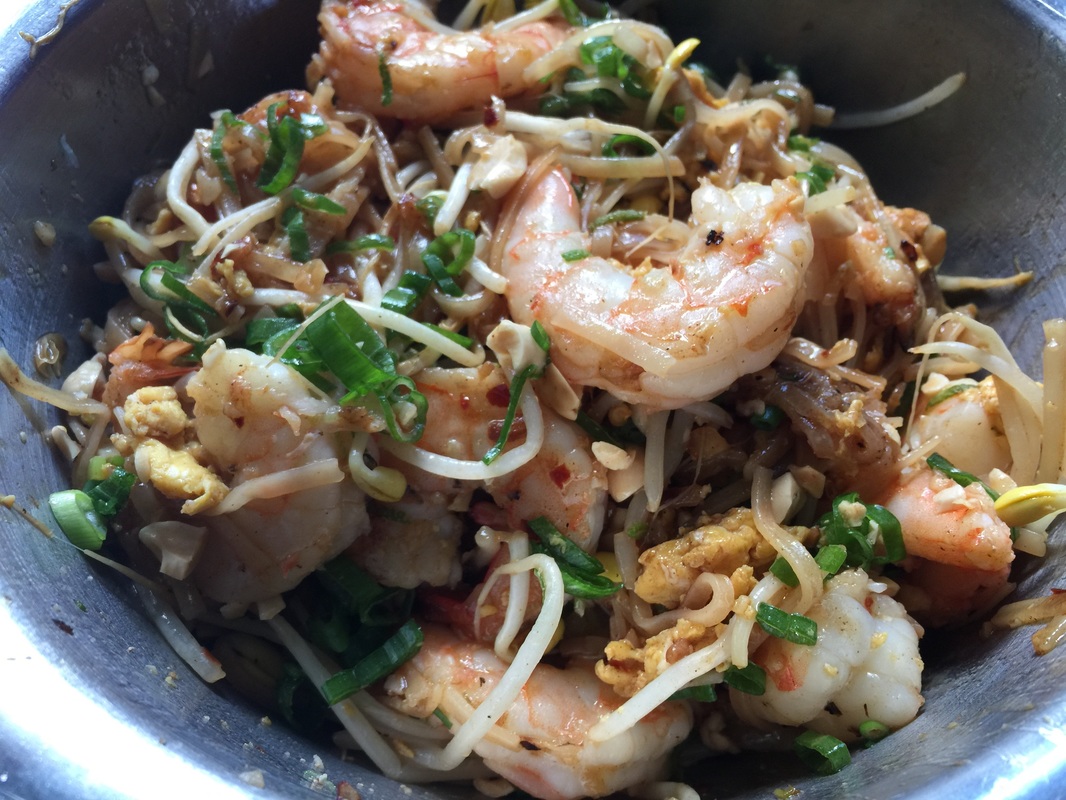
Sometimes I'll dress the bowl with some real maple syrup, other times just a pat of Earth Balance (or butter). 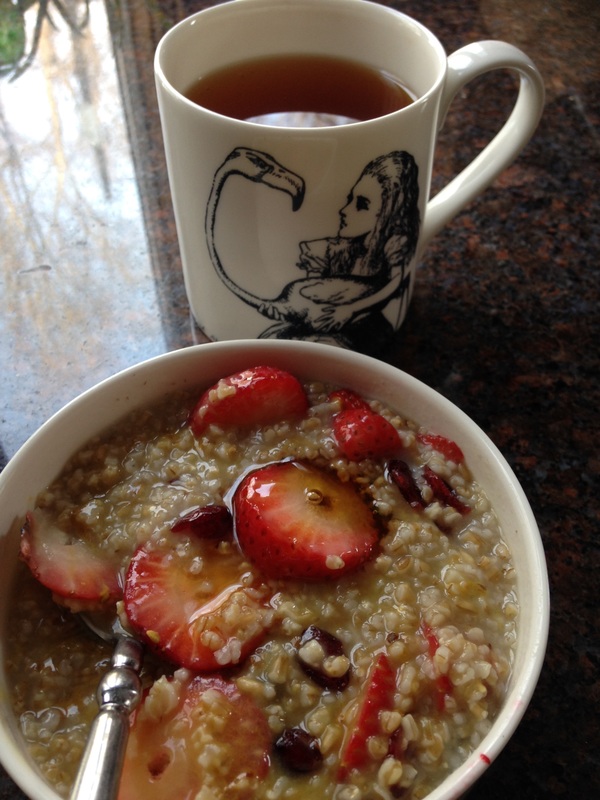 Steel Cut Oats with Berries 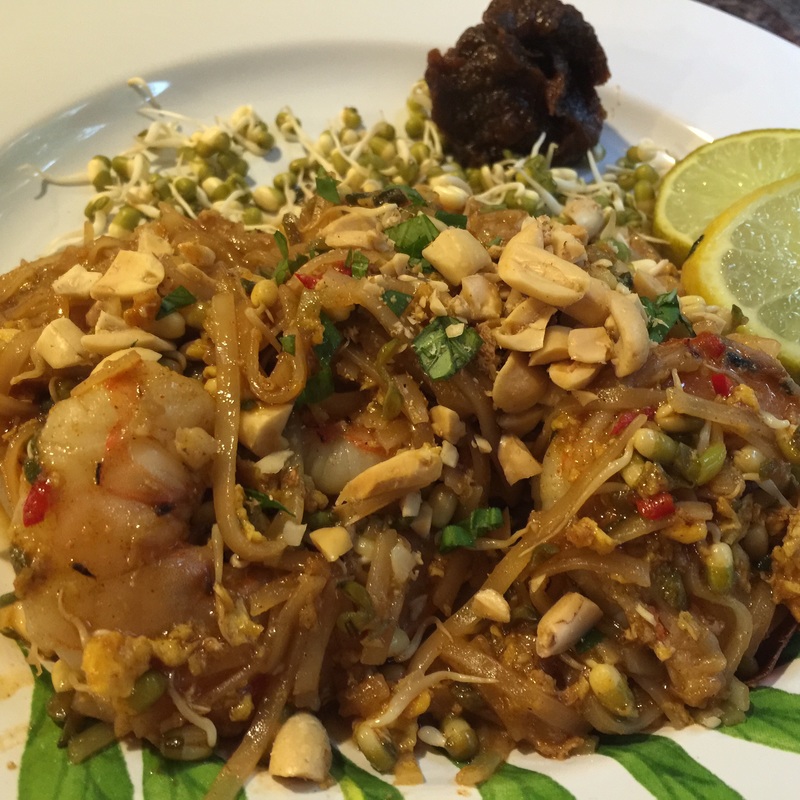 Shrimp Pad Thai I have to thank Nancie McDermott for this recipe. While it’s different from the recipe she shared in my Craftsy course with her, I never could have gotten to this stage without her original recipe and her help. Traditional Pad Thai uses certain ingredients that are difficult to find in the U.S., like tamarind, garlic chives, dried shrimp and a Thai pickled radish that I don’t know the proper name of. I can find tamarind paste sometimes in the Latin or Asian markets. I don’t live close enough to a really good Asian market to find dried shrimp and if I want garlic chives, I have to grow them myself. So, my version has some adaptations based on ingredients that more readily accessible. Shrimp Pad Thai
Soak the noodles in a large bowl filled with cold water for about 30 minutes. Make sure the water covers the noodles completely. The will become soft – but still leathery and change color from ivory to bright white Prepare the sauce: in a medium bowl, combine the fish sauce, soy sauce, honey, Tamarind, juice, lime juice, vinegar, paprika, and chili. Using a whisk, stir to mix everything well and dissolve the honey into a fairly smooth sauce. Place a serving platter for the finished noodles by the stove, along with a a pair of long-handled metal tongs for tossing the noodles. Prepare the remaining ingredients and have them handy by the stove. When you are ready to cook, drain the noodles well and place them by the stove. In a large wok, heat 2 tablespoons of the oil over medium heat until hot. Add the garlic and toss well until it releases its fragrance. Scatter in the shrimp and toss well. Cook the shrimp until they are firm and bright pink but not cooked through - about 1 minute. Remove the shrimp from the wok and set aside. Add the drained noodles and pull the mass of noodles apart to expose them to the hot pan. Add the shrimp stock and cook by tossing now and then and spreading the noodles out to expose them to the heat. When they begin to curl, whiten, and soften, stir the sauce mixture well and add about half of it, pouring it in around the sides of the pan. Toss well and cook, scooping and tossing and pulling the noodles apart to cook them evenly. Add a little more stock, pouring it around the sides in small amounts, to discourage the noodles from sticking. Add the remaining sauce and toss well. Lift the mass of noodles on one side, and pour the remaining oil onto the hot pan. Turn the pan to coat it with the oil, and add the beaten eggs. Turn the pan to spread them out, and let them cook undisturbed until they begin to set. Let the noodles cover the eggs and cook briefly. Then toss and scoop to mix the eggs into the noodles. Add half of the bean sprouts, and toss well. Add the green onions and half of the peanuts, and toss well. Scoop the noodles onto the serving platter. Pour the reserved lime juice over the noodles, and garnish with the remaining bean sprouts, remaining peanuts, and lime wedges. I like to finish it with some minced basil too. Serve hot. 
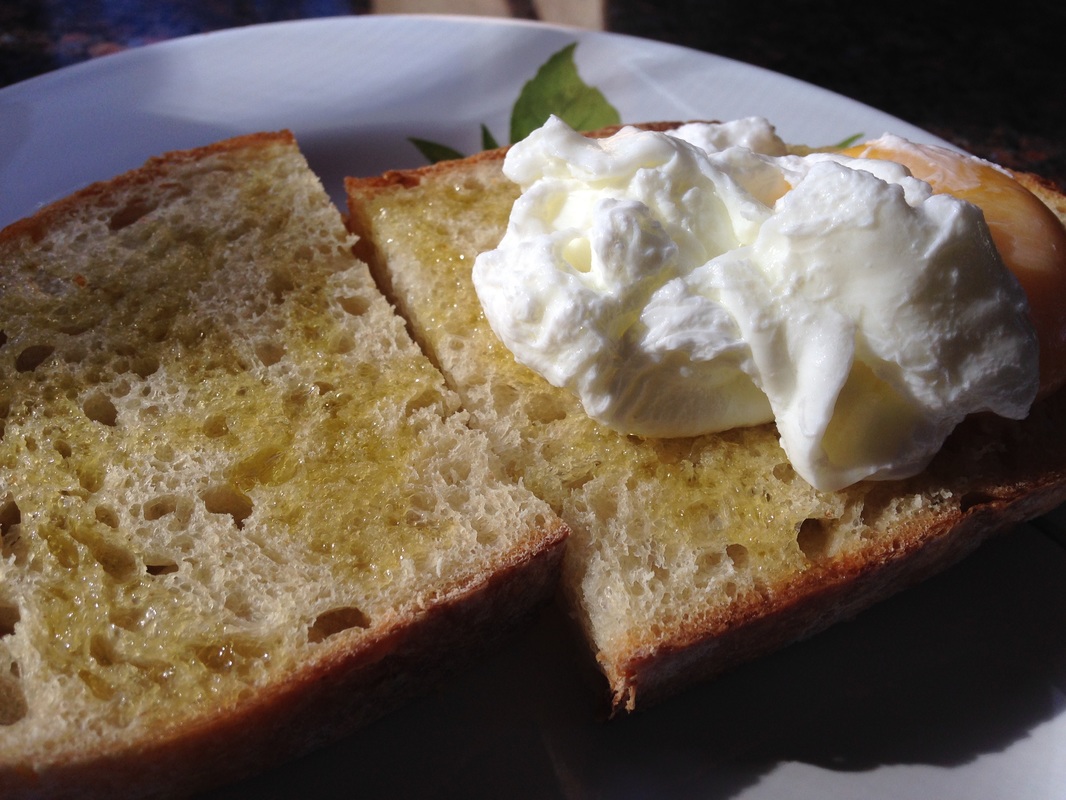
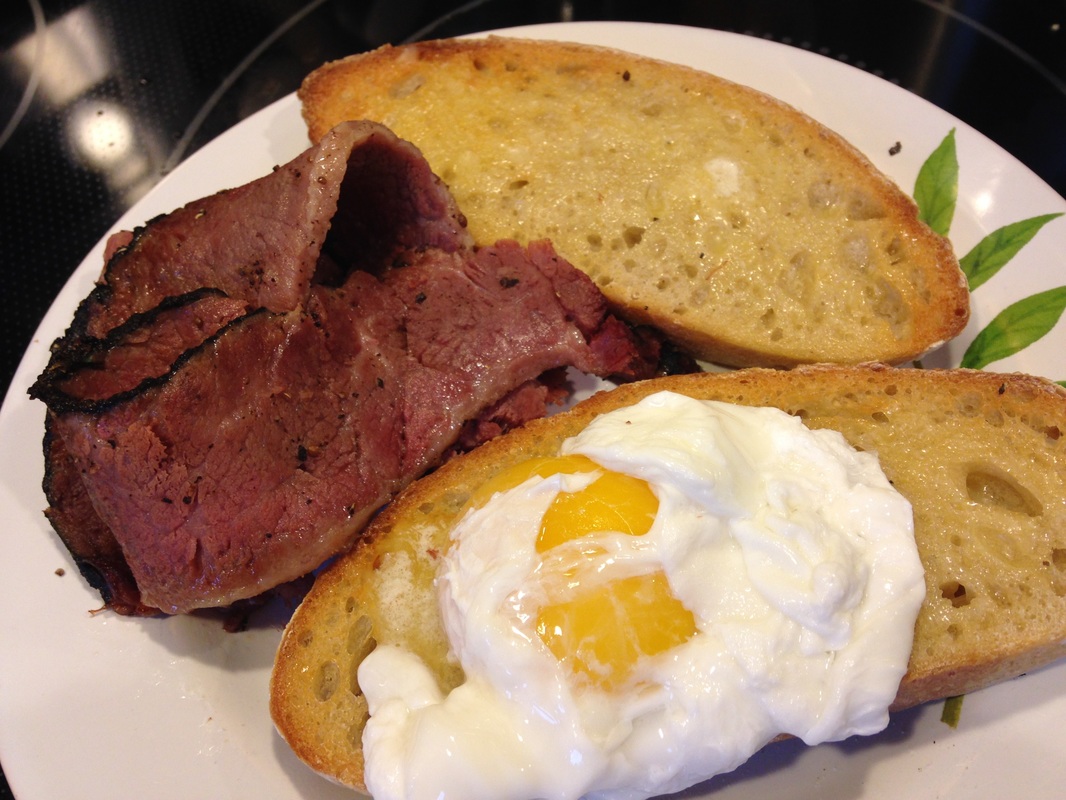
Poached eggs on homemade sourdough bread with garlic salami
Perfectly Poached Eggs
For perfect poached eggs, the most important step is to use fresh eggs. There are many tricks, gadgets and assorted cheats that people use when poaching eggs, like: · Putting them into plastic wrap before placing them into the water, so they retain their shape. · Using a poaching pan (which is really more like a double boiler) · Nuking them in a water bath in the microwave · Straining the raw egg first before putting them into the water Wonder How does a fantastic job of summarizing all of these different egg poaching methods in their poached egg blog. Each method has its merits, but I’m a fan of the old fashioned, traditional method that Alton Brown demonstrates to us here: Don’t have time for the video? His recipe (which I use every time) can be found here.  Dry Melontini has watermelon, watermelon juice, mint leaves and Bombay gin. I discovered this drink last summer, purely by accident. I had a very watery watermelon that I cut into chunks and put into a bowl. When I took it out of the fridge a few hours later, it was 2/3 full with watermelon juice. So I strained the juice into a cup, thew in some watermelon chunks and a few mint sprigs - and added vodka and ice. A friend came by and between the two of us, we must have knocked down at least 3 tall glasses of this cocktail each.
Well, I saw some small watermelons at the Farmer's Market this morning and bought one. When I came home, I was thinking about how lovely this drink would be with gin. So I poured some Bombay gin into the bottom of my glass, added the ice, watermelon chunks, mint sprigs and watermelon juice. I was right. It's incredible. 1 1/2 thumbs Bombay Gin 1/2 cup watermelon juice 1 mint sprig (approximately 6 leaves) 1/2 cup watermelon chunks Ice (to taste) Mix in a 12 ounce glass and serve cold. 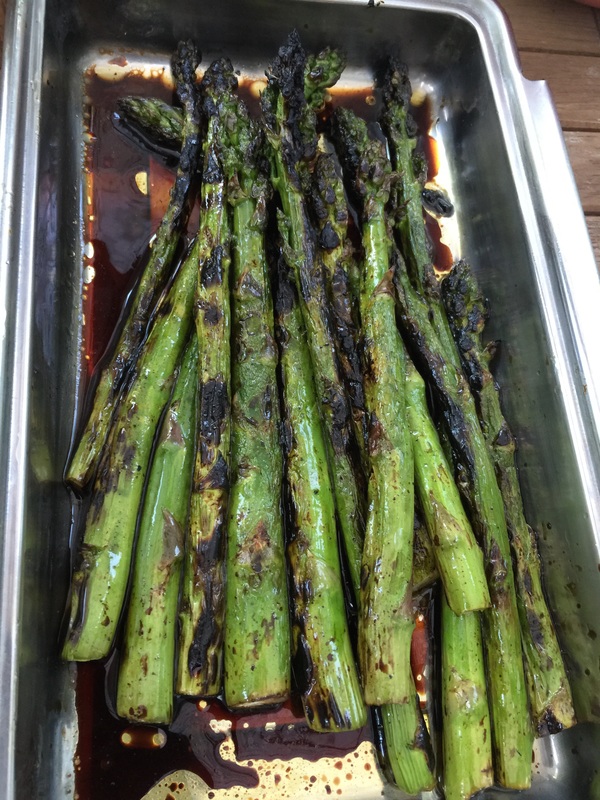 Grilled Asparagus Spring vegetables are particularly awesome -- not just because they taste great (and they do) but because it's the first time in six months that we are able to eat, fresh locally grown produce again.
This winter was particularly long, cold and snowy. The ground froze nearly three feet down. So when the thaw started, the water tables were extremely high. Two months later, they remain high, which is why we are able to have lush green lawns and vibrant spring flowers with very little rain. The spring has been especially kind to the asparagus. I went out into the field with my friend Sue (she runs Pine Hill Farm in Blooming Grove, NY) to help her pick asparagus this week. When I took my CSA share home, I ate it right raw, right out of the bag-- it was so tasty! One of the easiest ways to cook asparagus is on the grill. Here's how I do it... Sue's asparagus was so tender that it didn't even need a trim, but if yours is woody at the bottom, take a peeler and shave off the skin at the bottoms. Ingredients: 1 large bunch of Asparagus, trimmed 2 tablespoons olive oil 1 tablespoon Balsamic Vinegar Salt and Pepper to taste Put the cleaned, dried asparagus into a long flat dish with 2" sides. Season them with salt and pepper and coat them with the oil and vinegar. Let them sit for about 20 minutes while you preheat your grill. Add them to a very hot grill and watch them carefully because they can burn quickly. Remove them at the early signs of caramelization. Return them to the oil and vinegar marinade and serve. 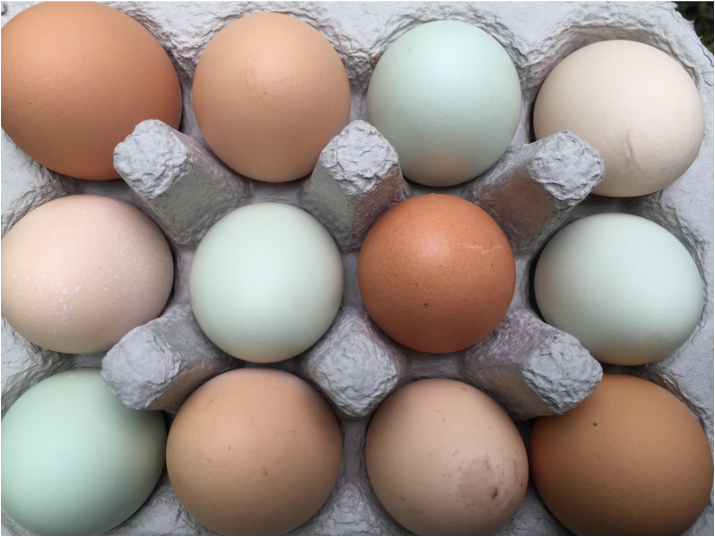 Fresh, Organic Eggs 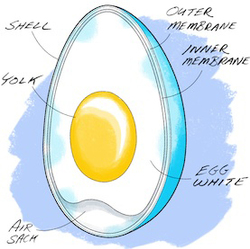 Photo from Scientific American Photo from Scientific American Let’s Talk About Eggs A quality egg is a rich, delicious, high protein food packed with mineral and nutrients that the body needs to thrive. Eggs are extremely versatile. They make our baked goods taste great. They can be poached, fried, scrambled, baked, pickled… You can turn them into omelets, frittatas, soufflés, meringues – even sushi! Eggs can add richness to a dish. They can bind ingredients together or lighten a batter when whipped. How do choose the best eggs? There are some great articles out there on how to determine the quality of an egg. This is a great guide from Mother Earth News. I prefer to buy organic eggs from local farmers that allow their chickens to roam free on their land. The woman I buy my eggs from feeds them non-GMO, soy-free feed. They also eat worms, bugs and all the other things chickens like to eat when they can wander through the grass. One of the first differences I notice is that their shells are much stronger than commercial eggs. It takes a little bit of effort to break them. Their yolks have a rich, gorgeous sunflower-yellow color and the taste is much better. The age of the egg matters! Eggs react differently to different types of cooking methods. Certain cooking methods require eggs of different ages. If you want a perfectly poached egg, you should always start with fresh eggs. You will see a distinct difference when you poach an egg that came from the chicken within 2-3 days. However, for hard-boiled eggs, an older egg (3-4 weeks) will peel and retain its shape much better and its yolk will set up more consistently. So if you are thinking about making deviled eggs, egg salad, Nicoise salad, or anything elese that requires you to begin with a hard boiled egg – you will want to keep those eggs in the fridge for about a month first. What’s inside an egg? According to the University of Illinois Extension, the average weight of an egg is 57 grams. “Eggs are especially valuable as a source of protein. In fact, egg protein is used as the standard against which the quality of other food proteins is measured. One egg contains about 6 to 7 grams of protein. People of all ages need adequate protein for building and repairing body tissues. The fat in the yolk is so finely emulsified that it is digested easily even by infants. The ratio of unsaturated to saturated fats is about 2 to 1. This is considered very desirable. Oleic acid is the main unsaturated fat. It has no effect on blood cholesterol. Eggs contain vitamin A, the B vitamins (thiamin, riboflavin, and niacin), and vitamin D. All are necessary during childhood and adolescence for growth. Eggs also contain an abundant supply of minerals, such as iron and phosphorus that are essential for building and maintaining strong, healthy bodies.” So that’s why body builders love them! Different types of eggs... There are so many different varieties of eggs that people choose to cook with from around the world. I've tried at least 15 different types of chicken eggs - from the tiny quail egg, to the small Bantam chicken egg (they make great foam for a whiskey sour) to brown, green and even blue chicken eggs, to the super rich and luxurious duck egg to the gigantic ostrich egg. Each egg variety has their own flavor profile. If you work in grams, you can adjust any recipe to account for the changes from egg to egg. Try them all -- each one is delicious -- and remember, they are good for you. 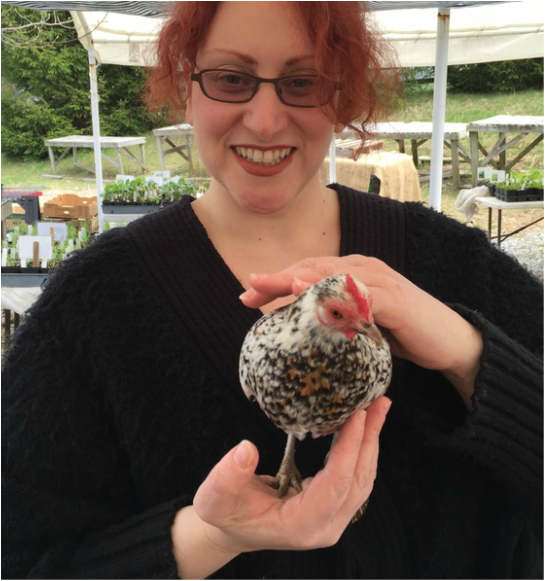 I'm holding a Bantam Chicken 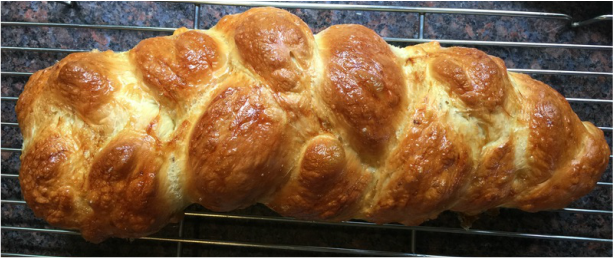 Lilac Braided Challah It's such a beautiful spring! The season has been especially kind to the lilacs, which are bursting out everywhere. Last week, I made lilac sugar. While I watched the bouquet of lilac blossoms on my table begin to wilt, I decided to use them to make a lilac Challah bread. I used the lilac sugar in the recipe, but I also stripped off the petals of one of my blossoms and added it to the dough in the mixing stage. For the recipe, I used Peter Reinhardt's The Bread Baker's Apprentice Challah recipe. But instead of the SAF Red Instant yeast that I'll use for lean doughs, I used the Gold SAF Instant Yeast instead. And, for added richness, I replaced two of the eggs in this recipe with duck eggs. 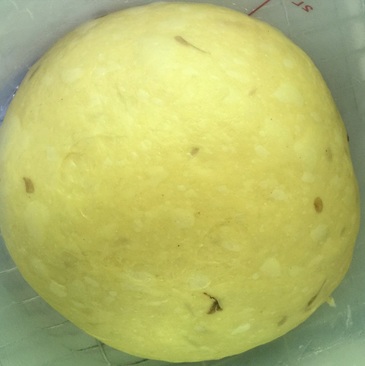 Lilac Challah Dough Now, It's been a while since, I've braided anything, so I had to practice getting used to the tension in the bread dough, but we got there. I was so pleased with the beautiful the strands of petals weaving through the dough. 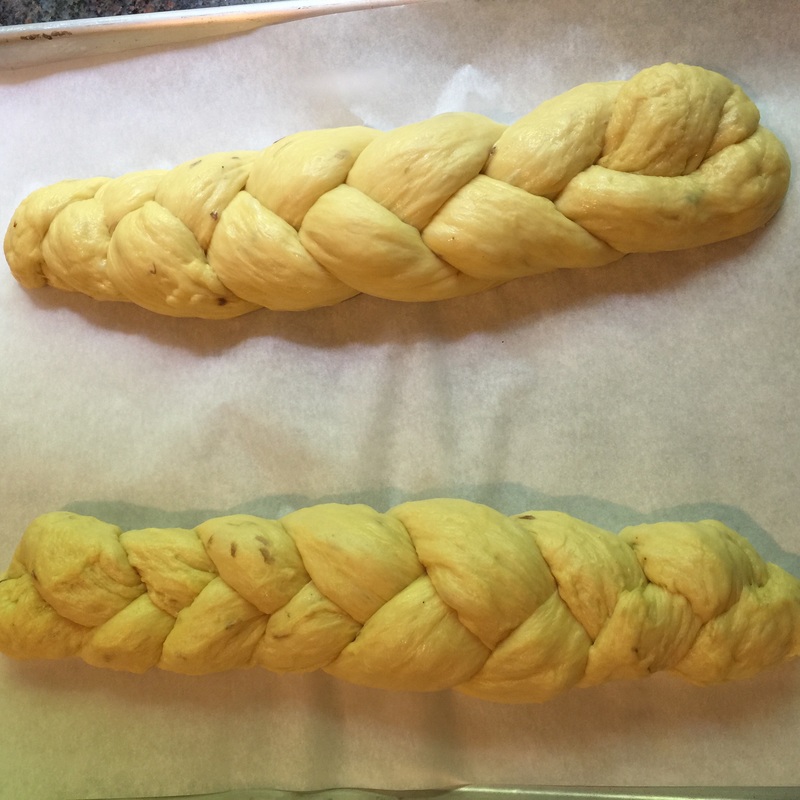 Lilac Challah Braids They proofed beautifully and then baked at 325 convection for about 45 minutes until they reached an internal temp of 200 degrees. 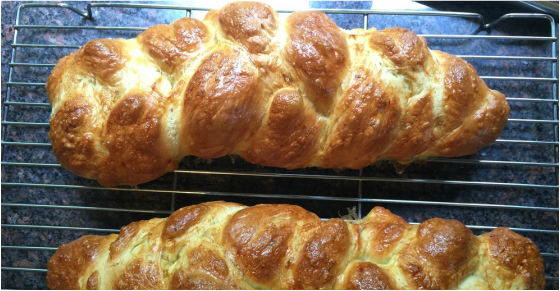 Lilac Challah Bread And finally, served with a little local raw honey... 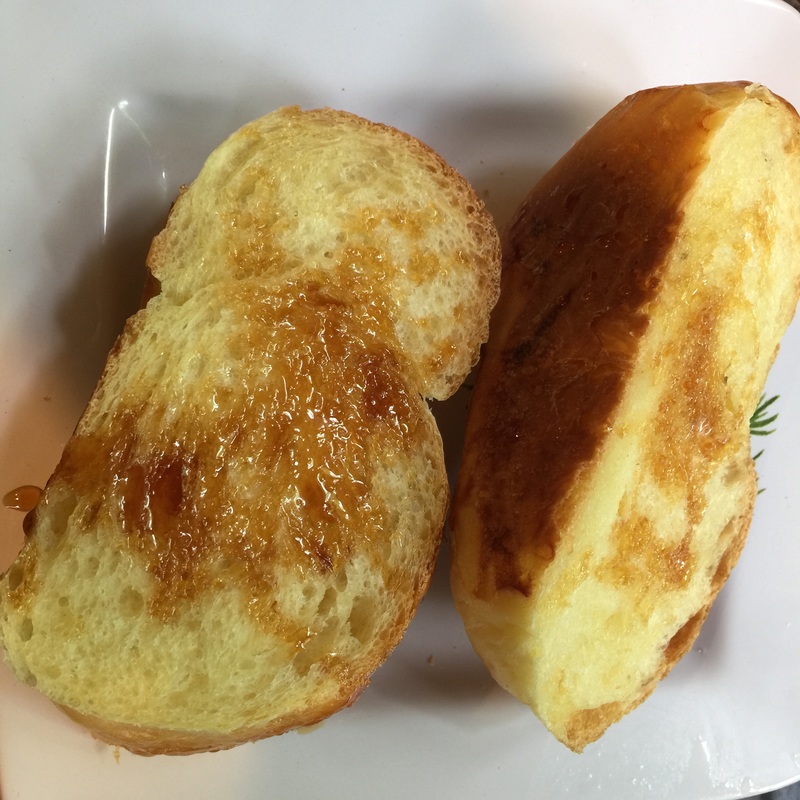 Sliced Lilac Challah Bread with Drizzled Honey Well friends, it's been many years since I maintained a food blog. With so many social media channels, it's been easy to just take a picture, post it on Instagram and share it across every other social platform. At first, people would admire my photos. After a while, they began asking for my recipes. I found I was typing up recipes at least once a week.
Friends and fellow members of food-related forums began asking me if I had a blog. So, after a nearly 10 year hiatus, here it is! It's my intention to focus this blog on sharing my cooking and food exploration with you. I will try to include photos, techniques, methods, and recipes whenever possible. While I have taken many different cooking and baking classes throughout my life. I am not a professionally trained chef or baker. I am just a passionate enthusiast and home cook that constantly strives to learn more. I have started to populate the site with some of my existing recipes, but I'll keep at it over the coming weeks until there is a robust archive. If the recipe is adapted, I'll cite the source. If the recipe comes directly from a book, I will not republish it here without the author's permission. Instead, I'll site the book and the author's name for you. Within the past 10 years, I developed some severe food allergies, particularly pork and dairy. So, I often modify and experiment with existing recipes to convert them into delicious, dairy free or pork free alternatives. It gives me great pleasure when people try my recipes and succeed. So, please do let me know if something did - or did not work out for you. I welcome your feedback. Thank you all for your encouragement and support! Deb 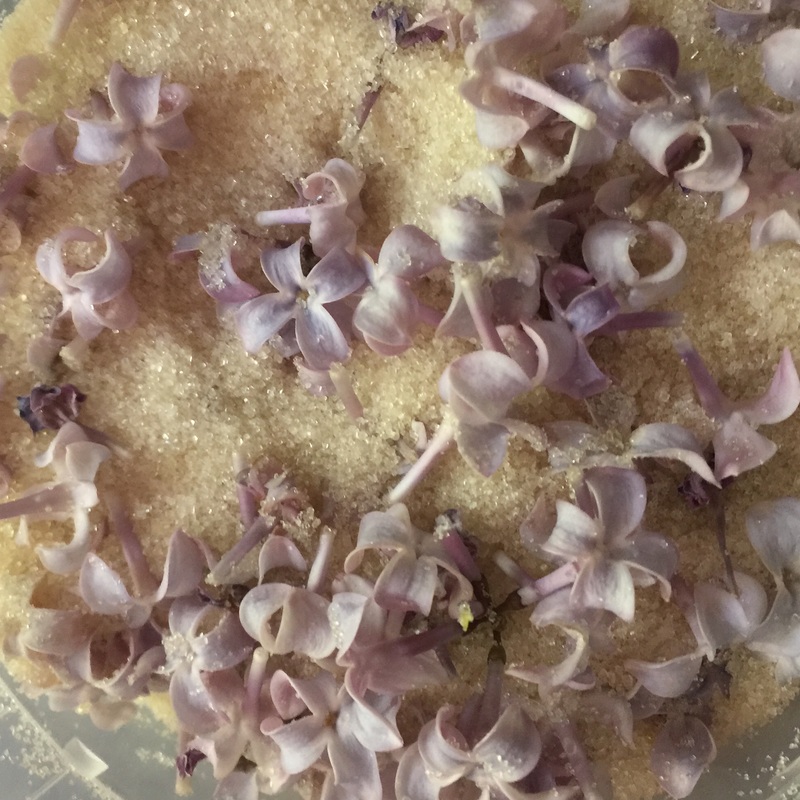 Lilac Sugar I follow a fabulous baker on Instagram called @thelavenderbakery. She runs a bakery in London called, The Lavender Bakery. Not only is she an incredible baker, but she's a lovely person as well. I recently shared a photo of my lilacs in full bloom (for the first time since I planted them 8 years ago) and she suggested that make Lilac sugar. Well, the next day, I cut some lilac blossoms. I made a bouquet with some and transformed the rest into Lilac Sugar. This is really more of a method than recipe. First, I washed the blossoms and let them dry completely. Then I pulled the flowers from two full blooms and made sure there were no stems. Next, I poured granulated sugar into a dry, quart sized container and mixed the blossoms in. I sealed it and put it in the cabinet. In a few weeks, I'll try making lilac sugar cookies, Lilac brioche, or maybe even lilac whipped coconut cream...  Lilacs in Bloom |
DebI'm a home cook with a lifelong passion for learning, exploring and experimenting in my kitchen. You can find me at @Debs1 on Twitter and @Debs121212 on Instagram. Categories
All
Archives
July 2020
|

 RSS Feed
